22 KiB
Management interface
Contract node management interface
The address of this interface is: NodePortal.html
User Management Menu
User management allows login users to view the current user distribution and user active statistics.
An overview of
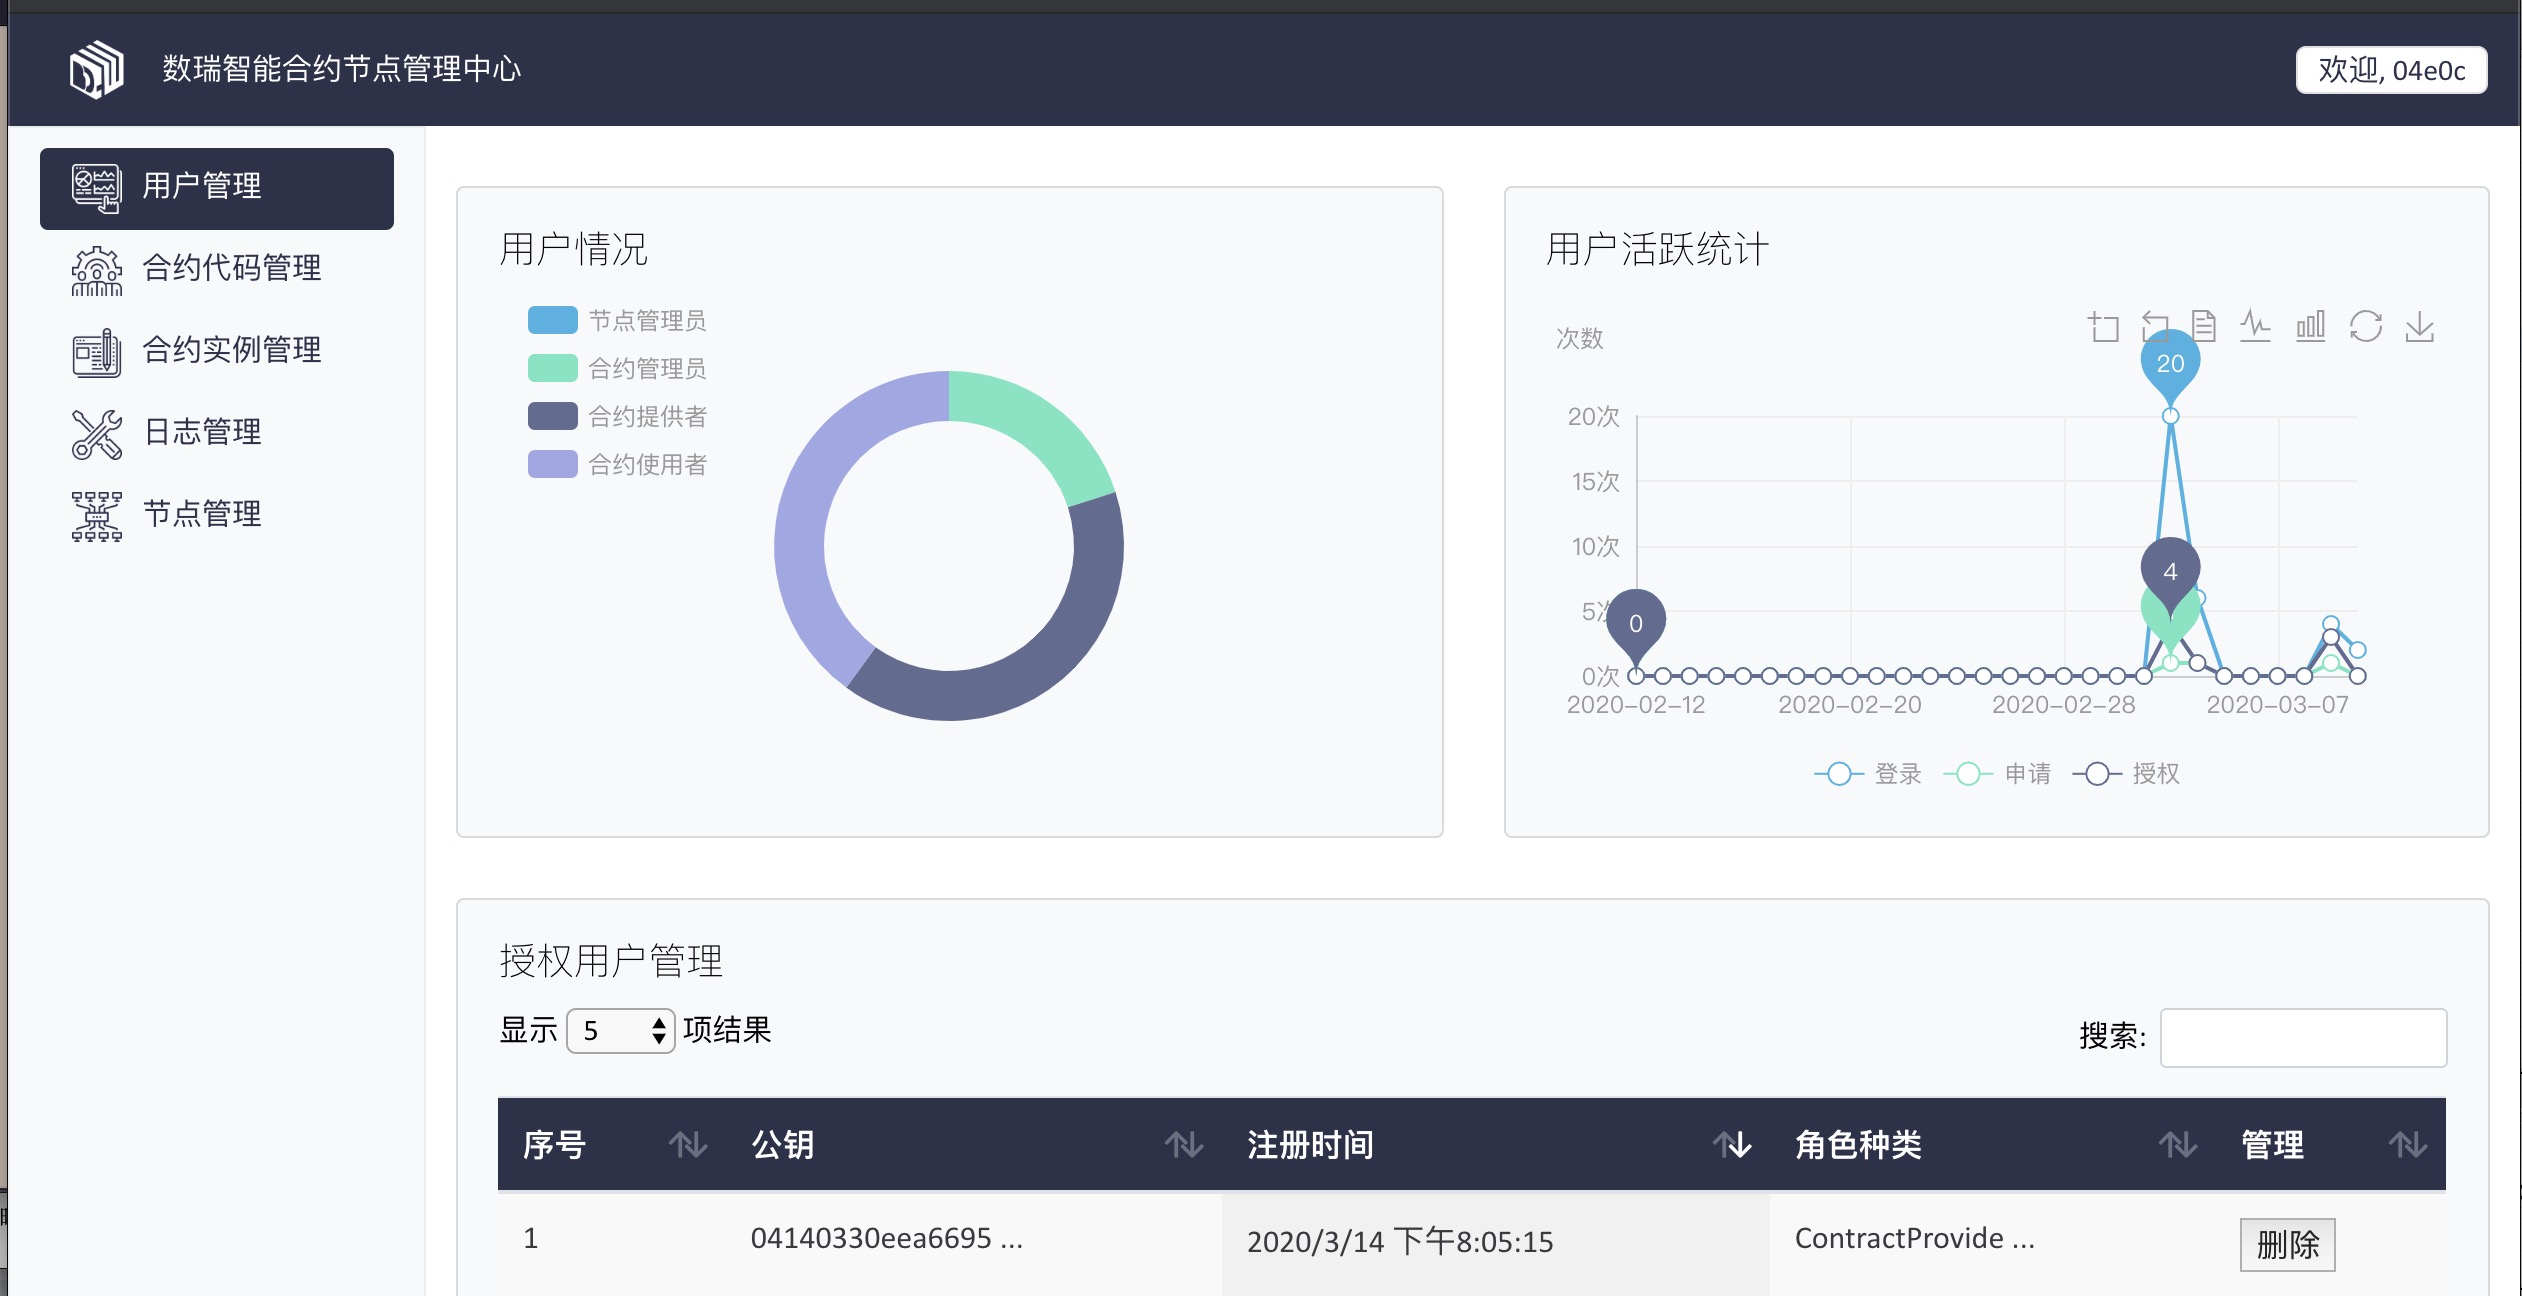 The node user management page has four modules: user information, active user statistics, authorized user management, and unauthorized user management.
User Type Distribution
Calculate the number of four roles held by the current node administrator: contract provider, contract administrator, and contract user 
Active User Statistics
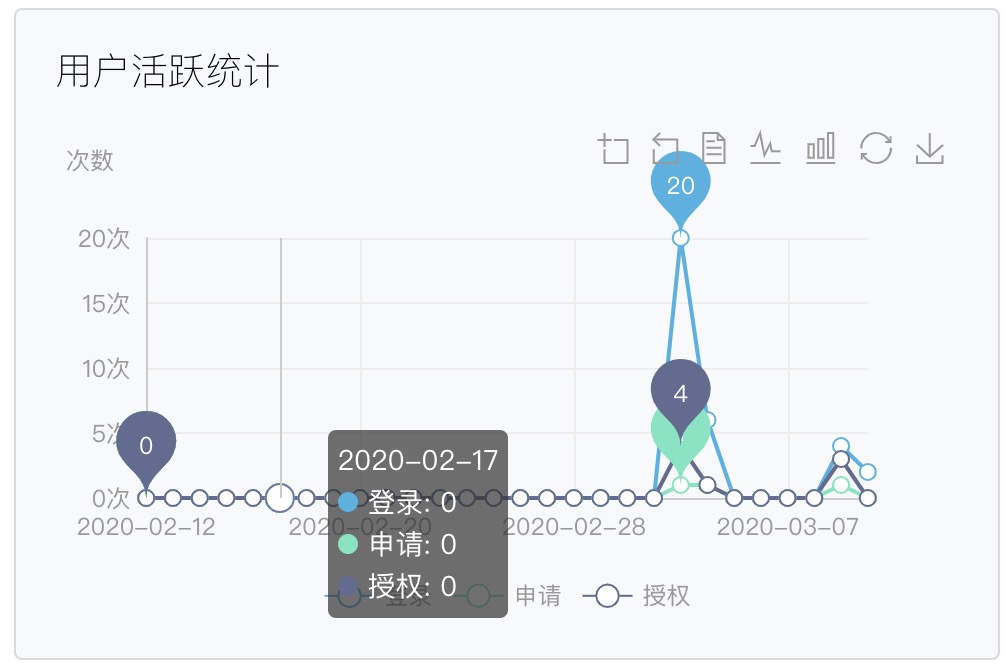 statistics 30 days The login, authorization, To apply for the number of times
Current User Information
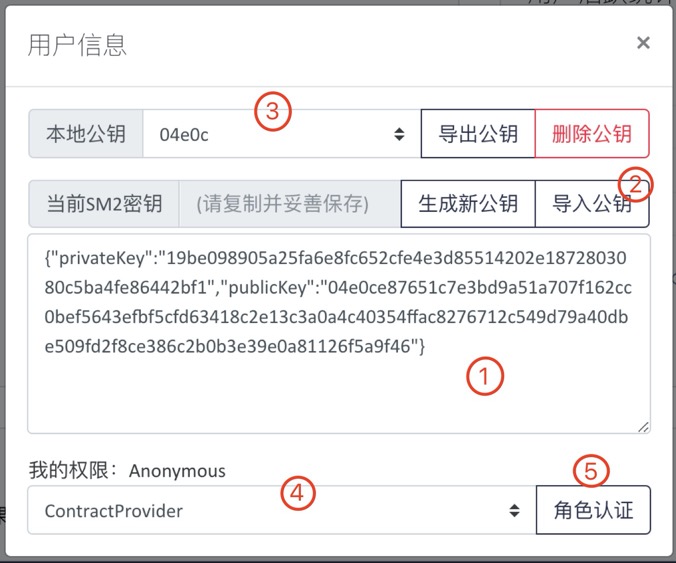
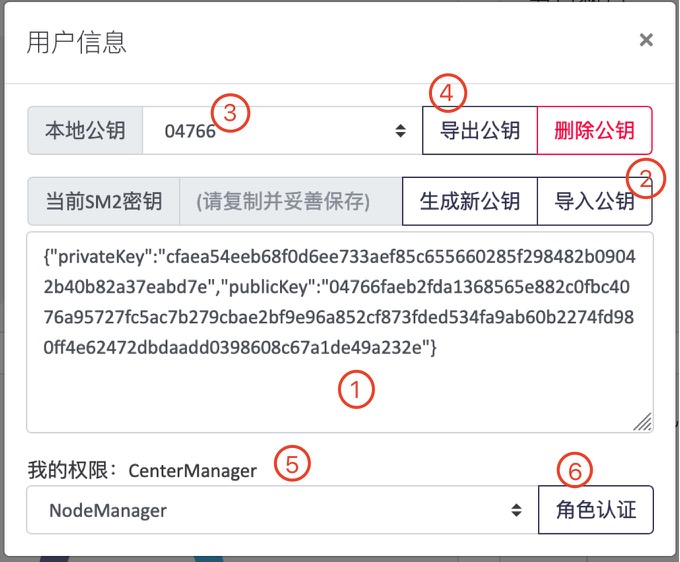
- In this text box, you can view the public and private keys of the current user. If other users want to use their public and private keys to log in to the node administrator interface, they can copy their public and private keys to this text box.
- After copying your public and private keys, click Import the public key to add the public key to the local node administrator
- The first five public keys are displayed in Local public key. If you select your own public key, the role of the selected public key will be displayed in My permission. If the node has not been authenticated by the central administrator, the default value is Anonymous.
- If you are not a node administrator and want to join the network of a central administrator, use your own public and private keys to import the key to the user management where the central administrator resides for authentication.
- If you want to perform more operations on contracts, you need to authenticate different roles: contract administrator, contract consumer, contract provider, and then Role of certification
List of authorized and unauthorized users
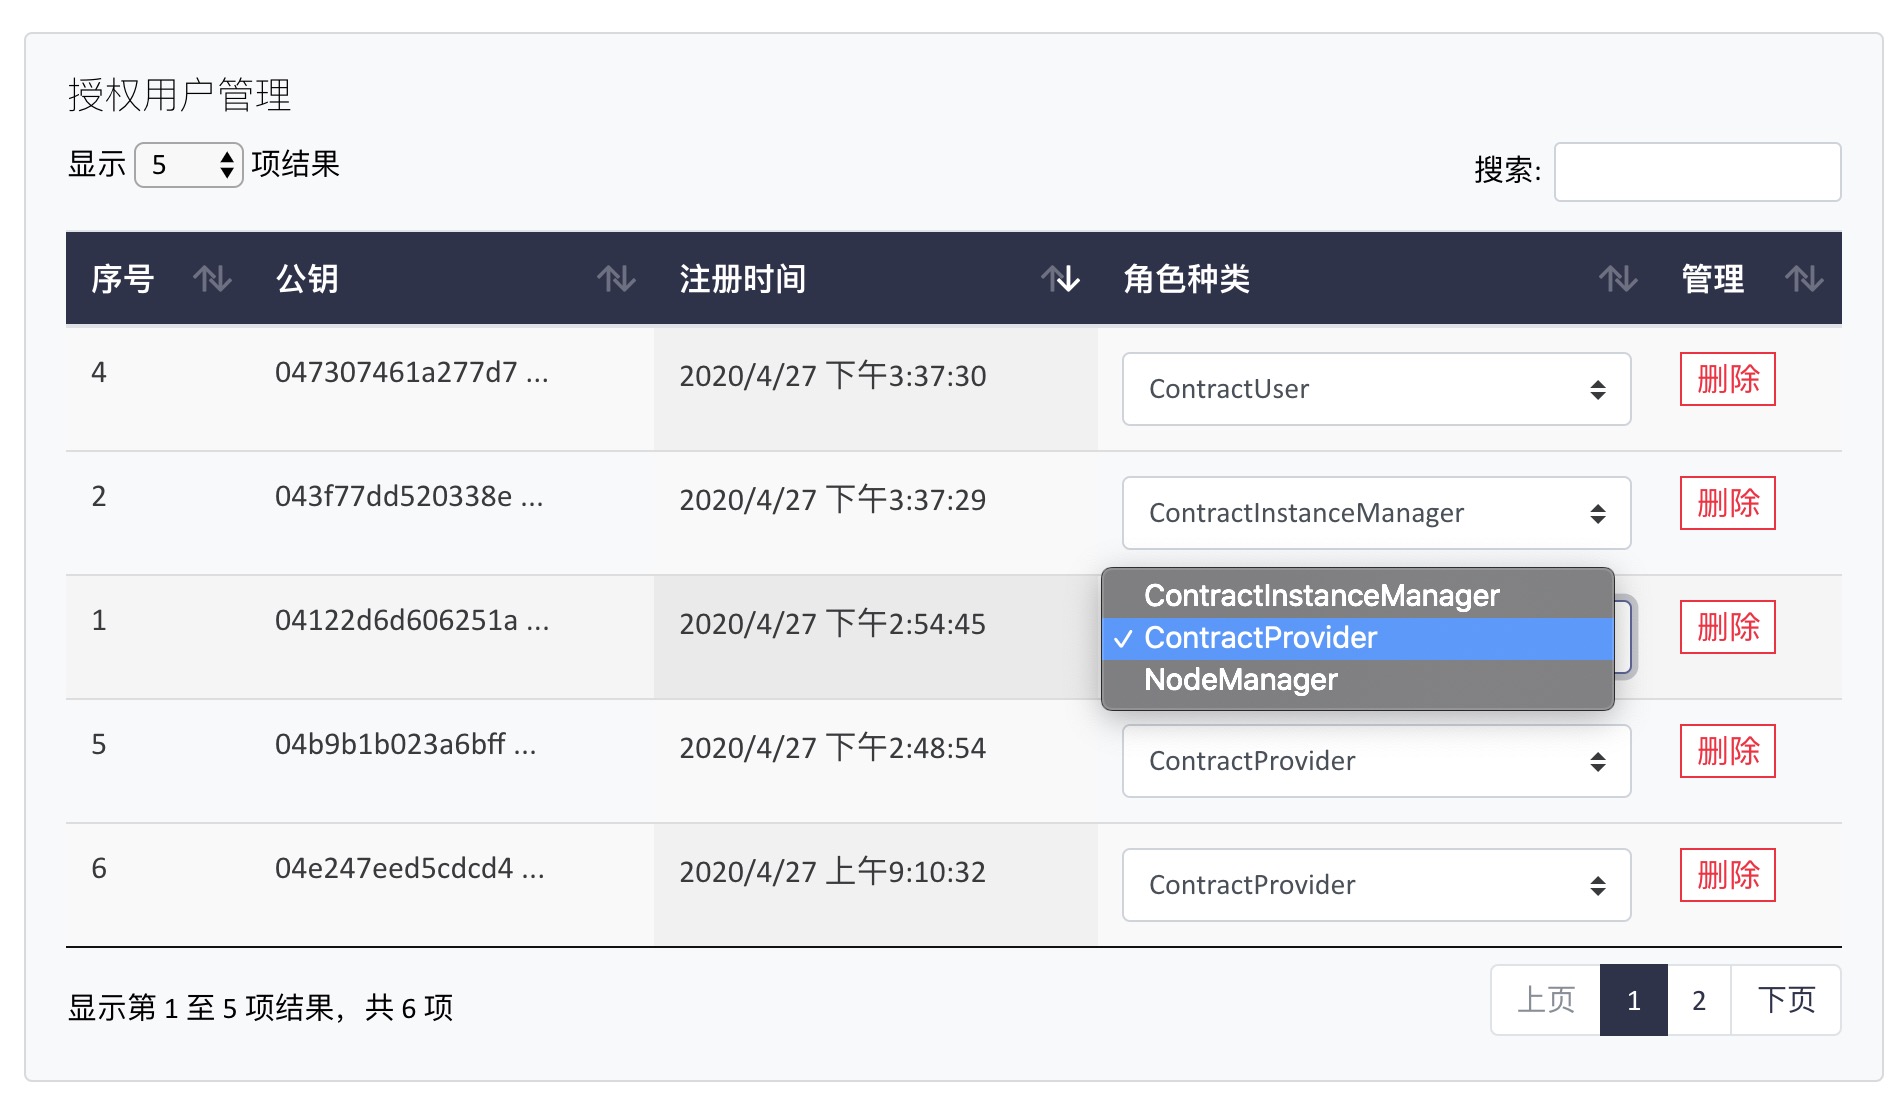
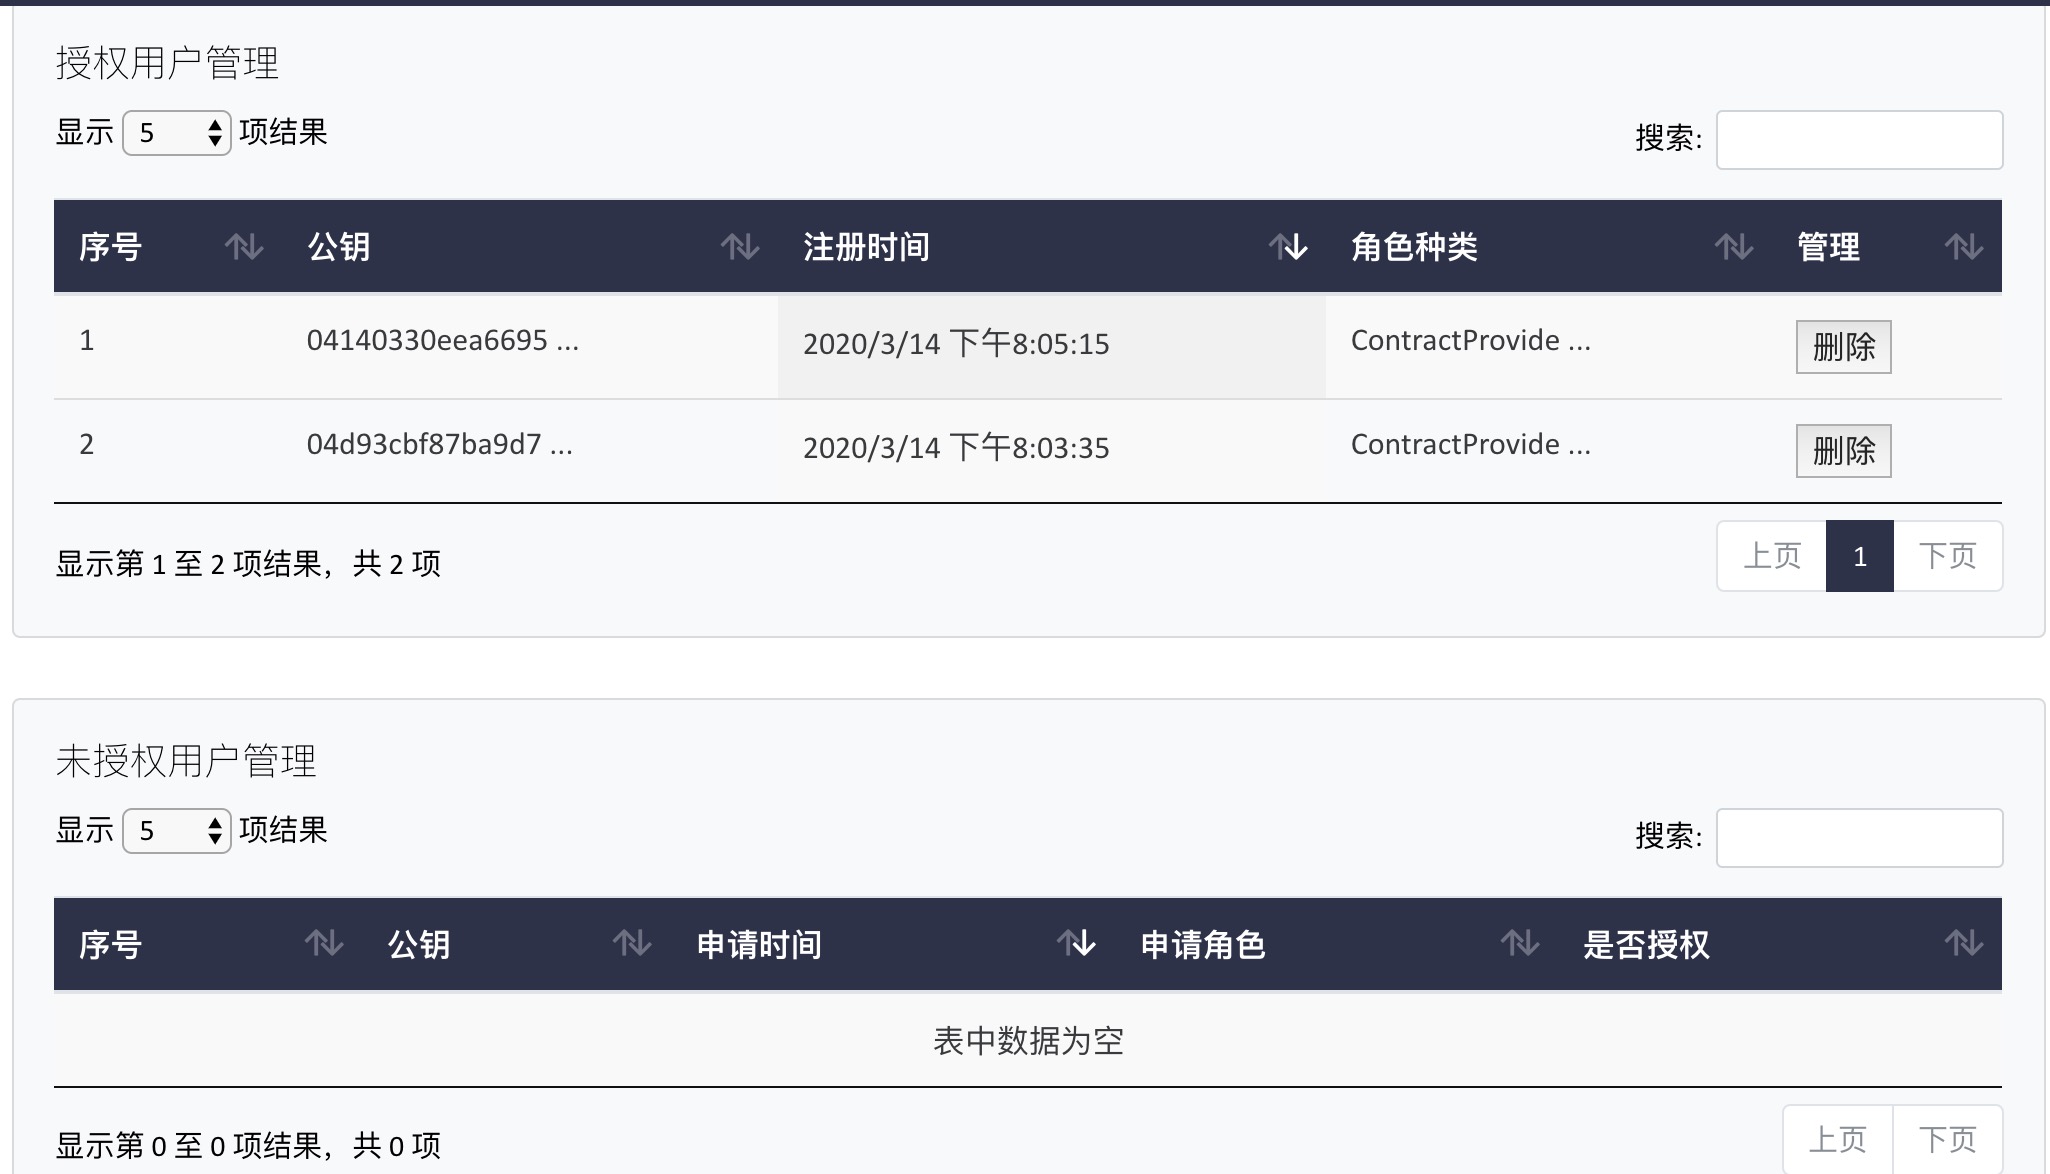 After the node administrator authenticates the role, the node administrator will see the application information with the public key in the Role management is not authorized form. If yes, click . If no, click . After authorization, you will see a list of authorized nodes in the Authorized Role Management table. If the node administrator wants to remove a role from a node, enter delete in the entitlement role management list.
Contract code management menu
The contract documents
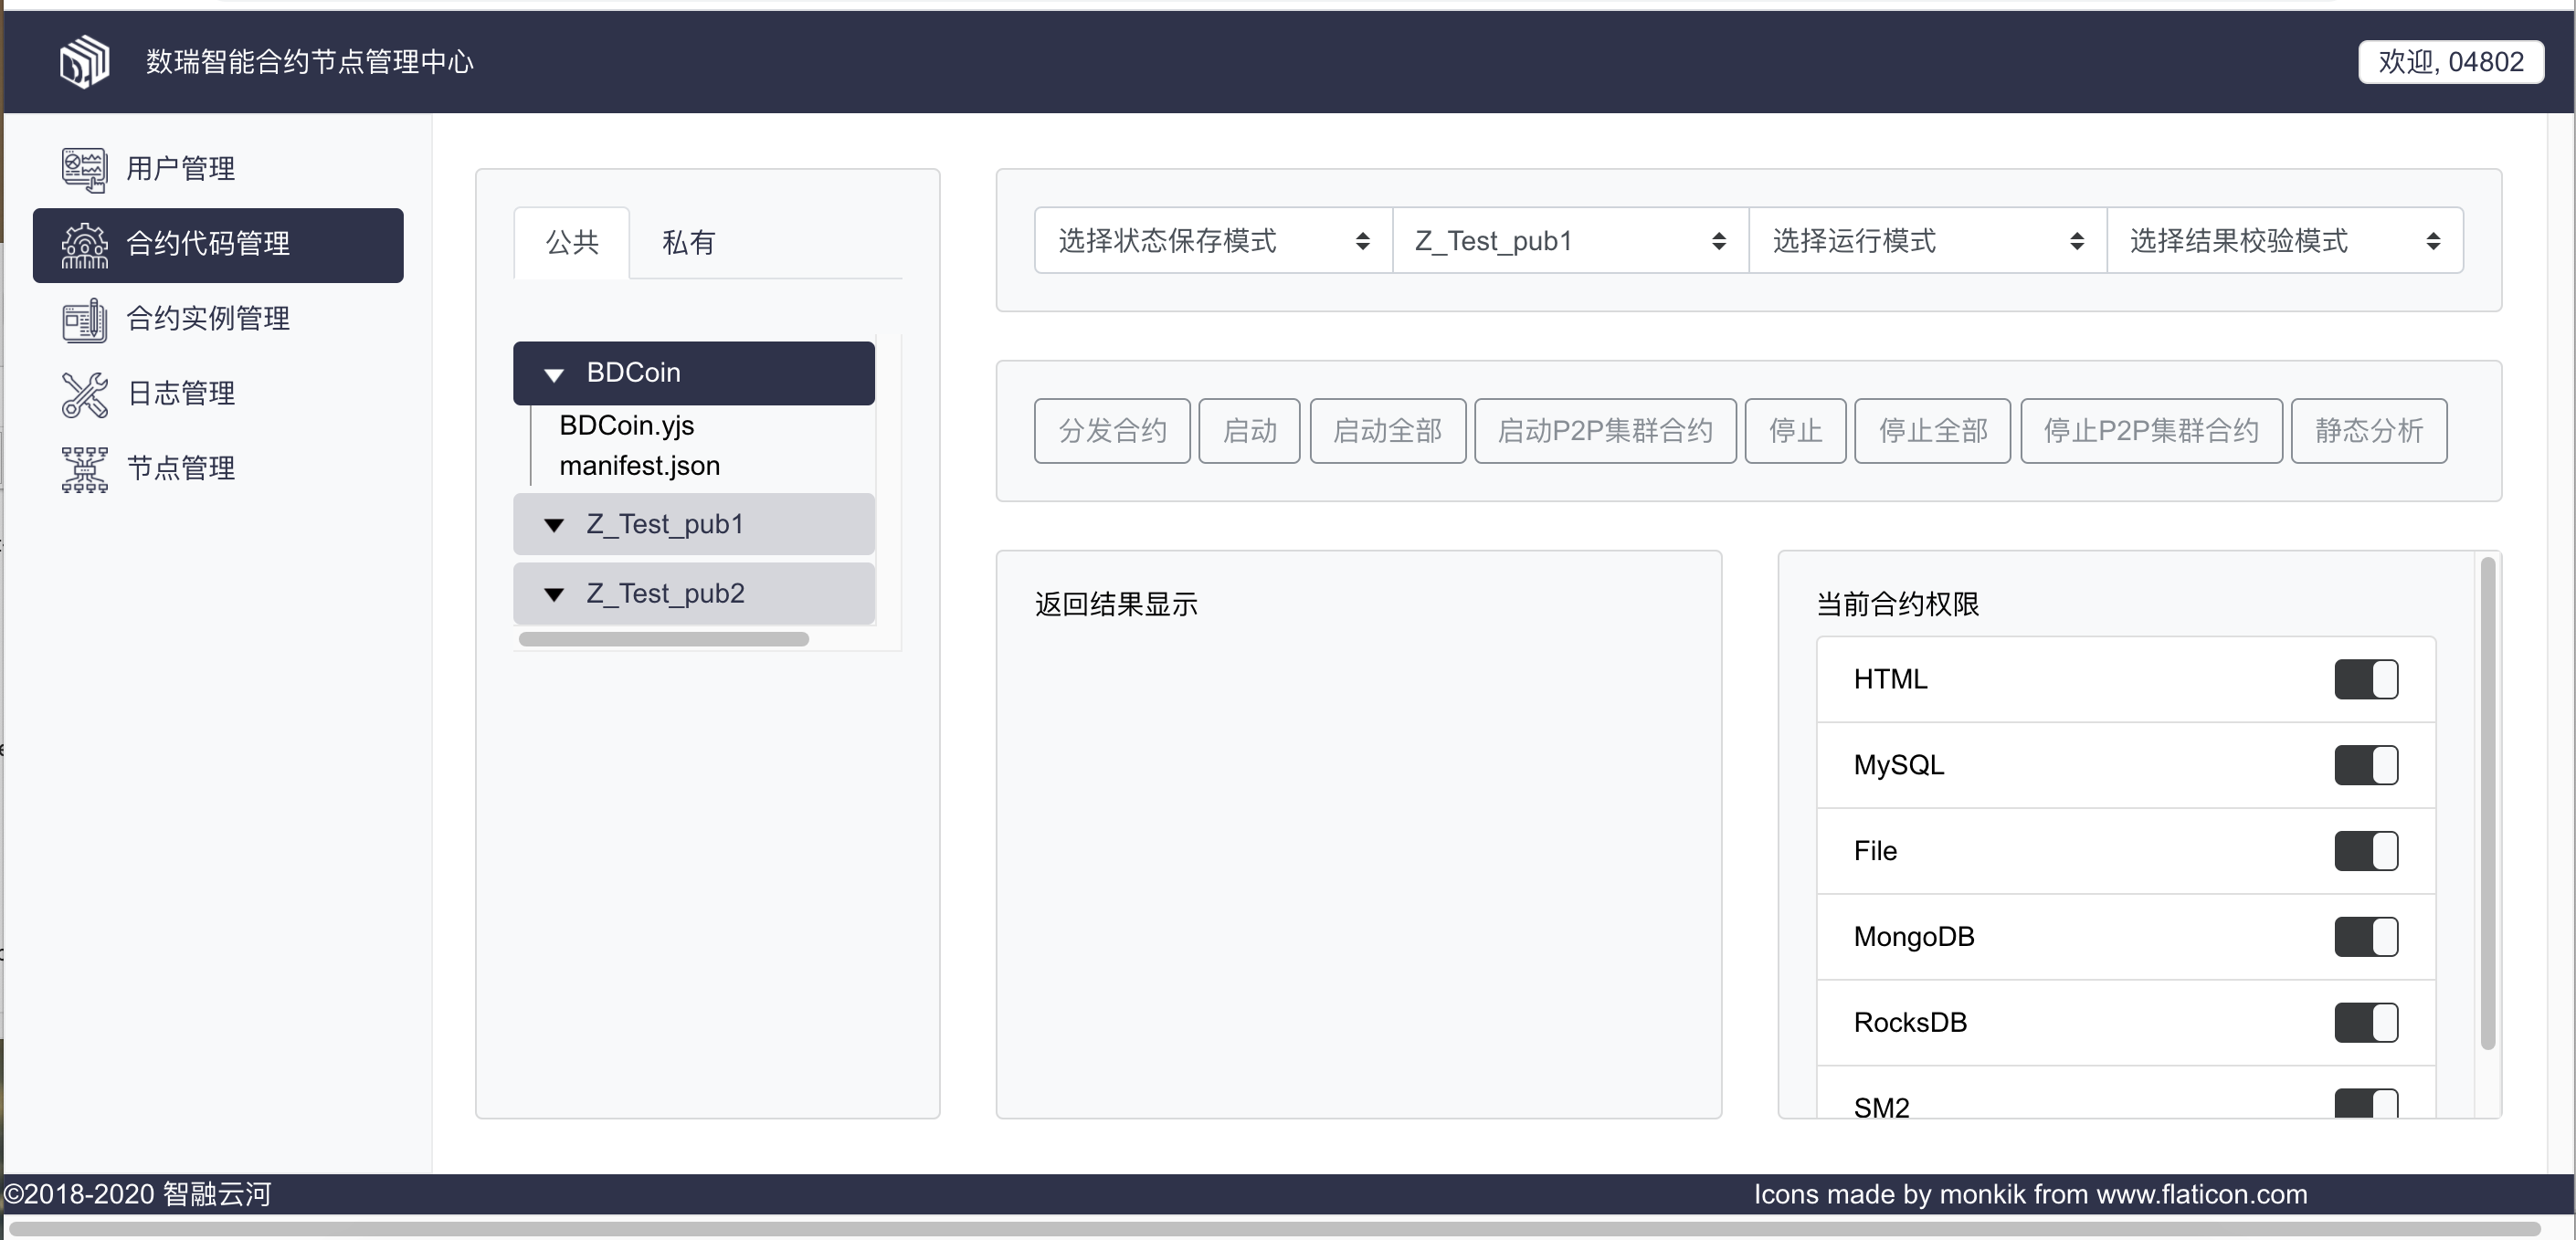
In the Contract Code Management menu, users can see public contracts as well as individual private contracts. 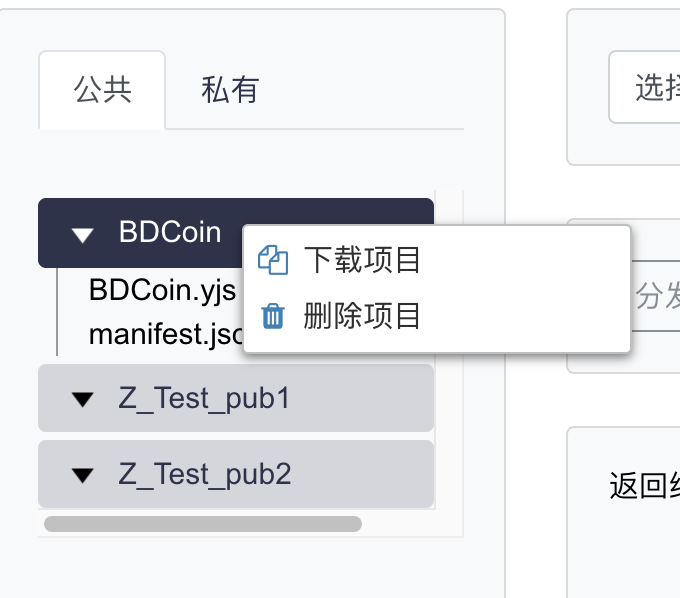
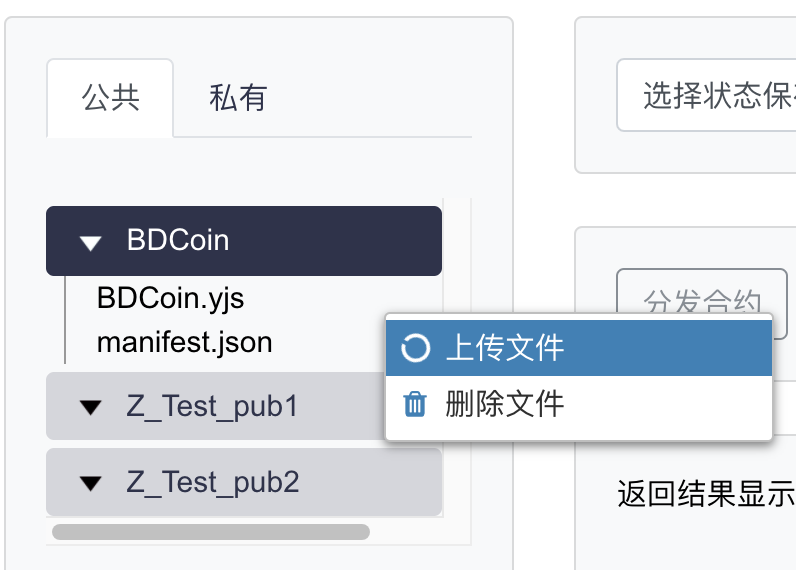
For public contracts, node administrators can delete and upload files, and download and delete contract items. 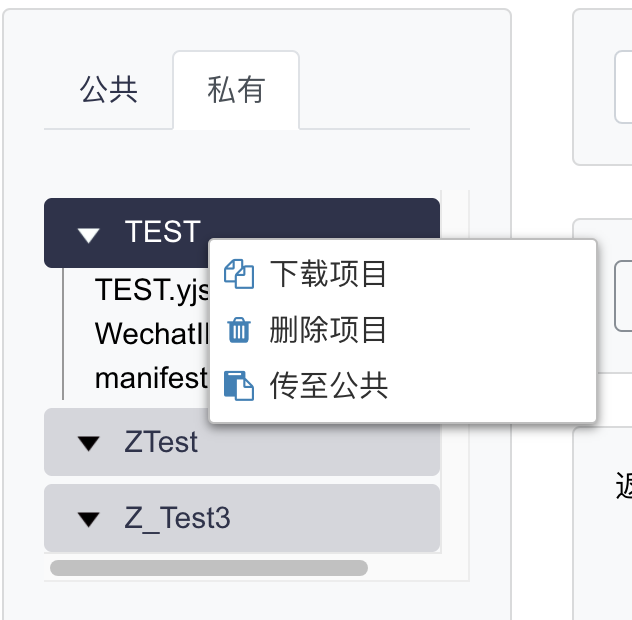
For private contracts, the contract provider can delete and upload files, and download, delete and upload contract items to the public contract directory.
The following is an example of working with a contract file.
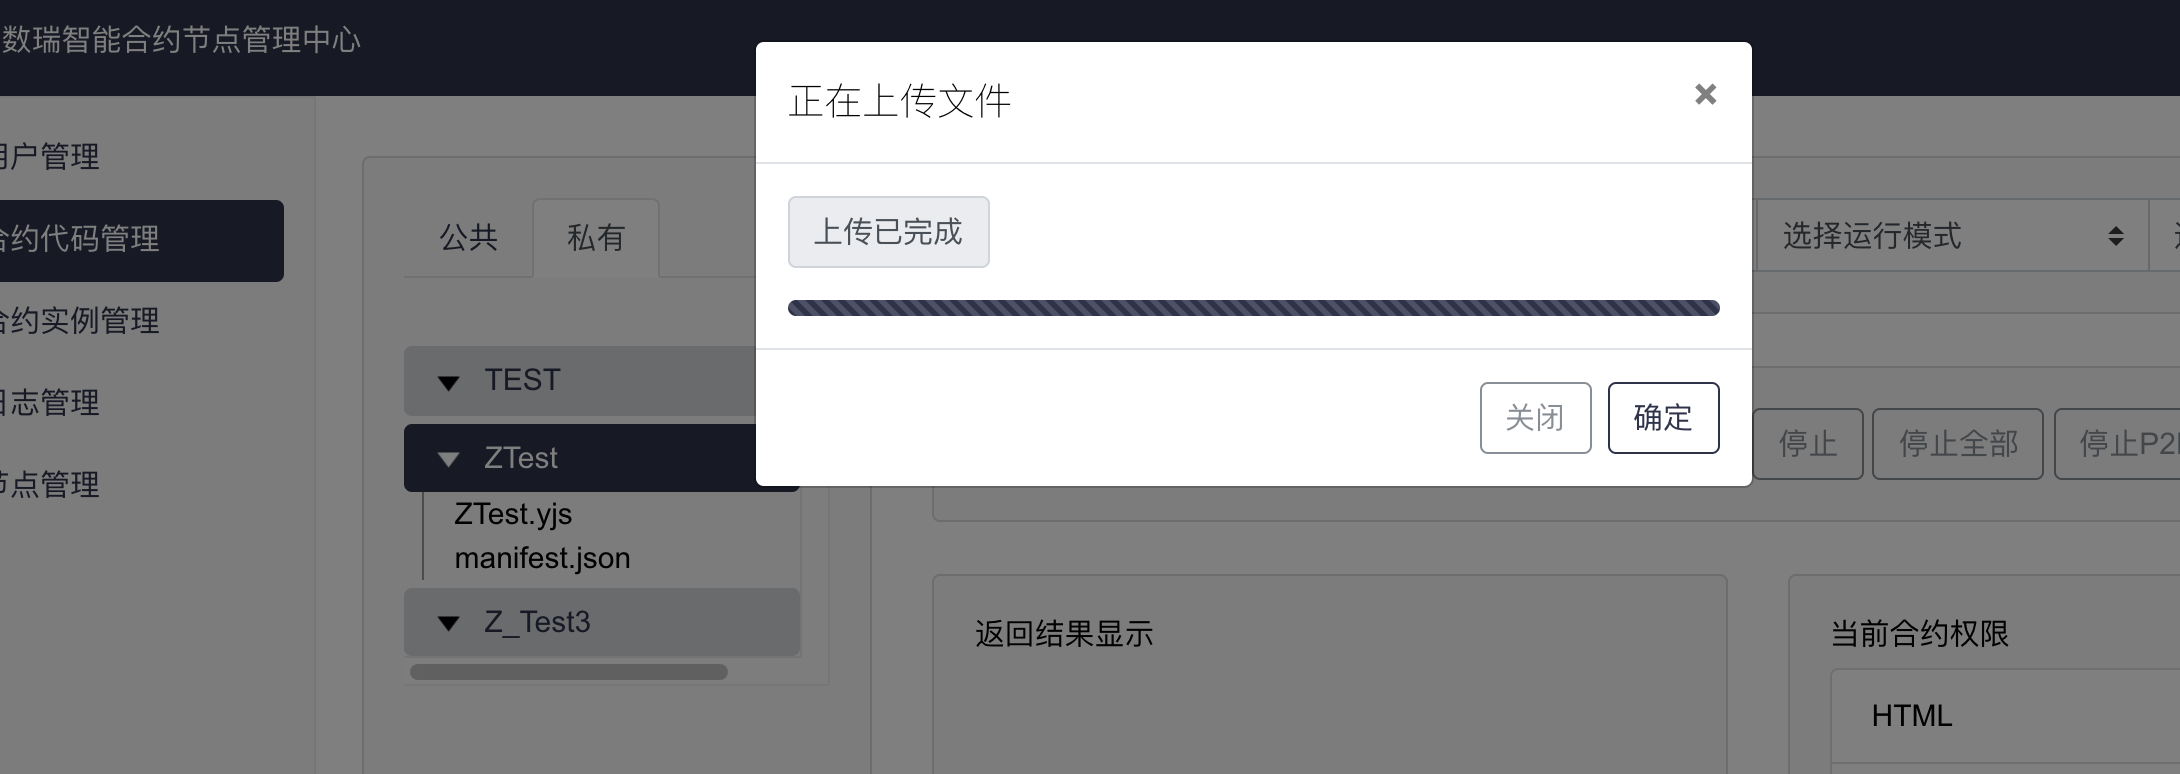
Upload a file
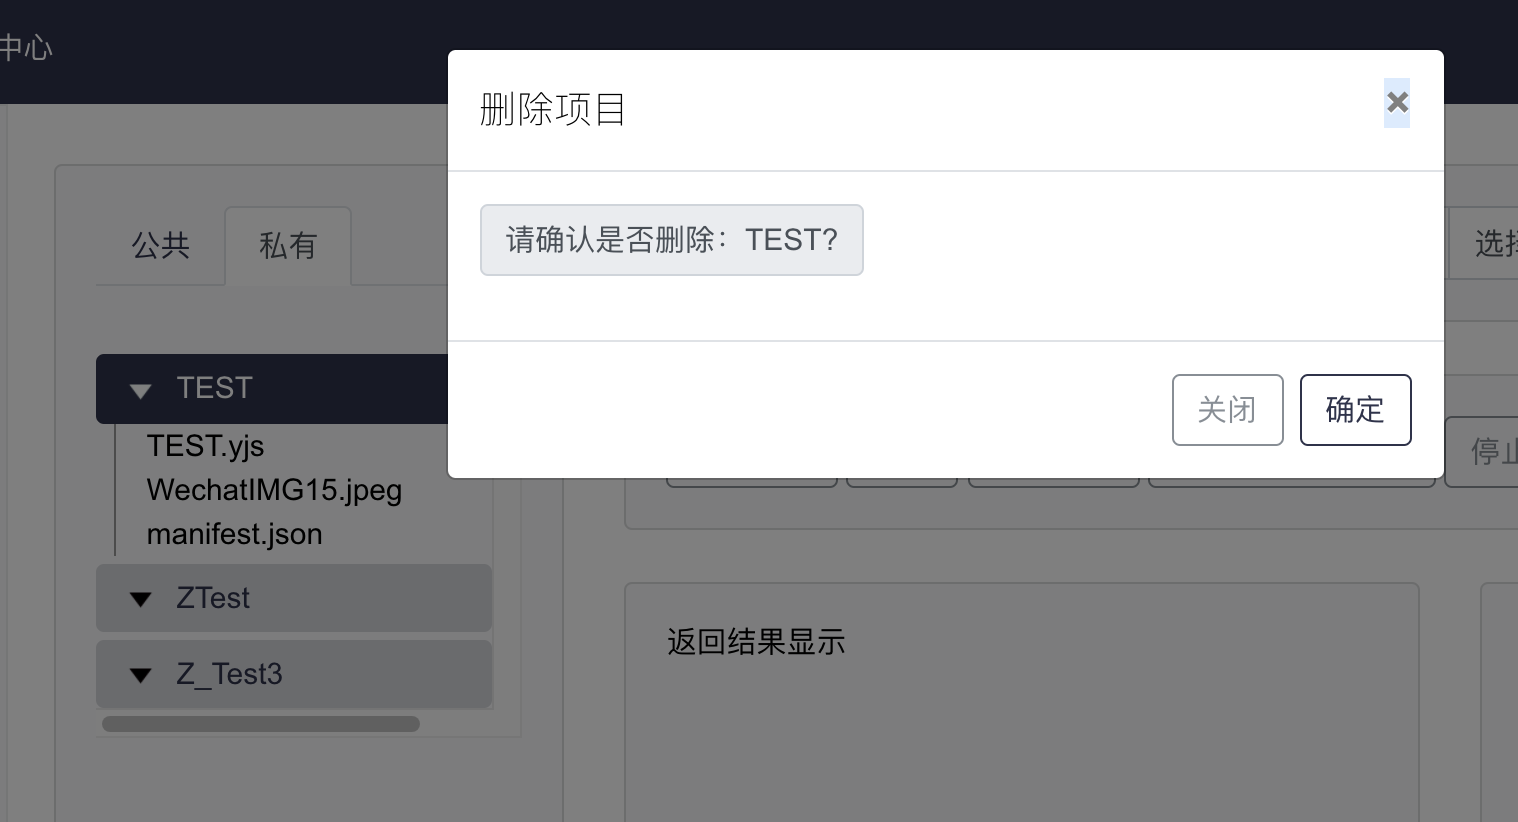
delete
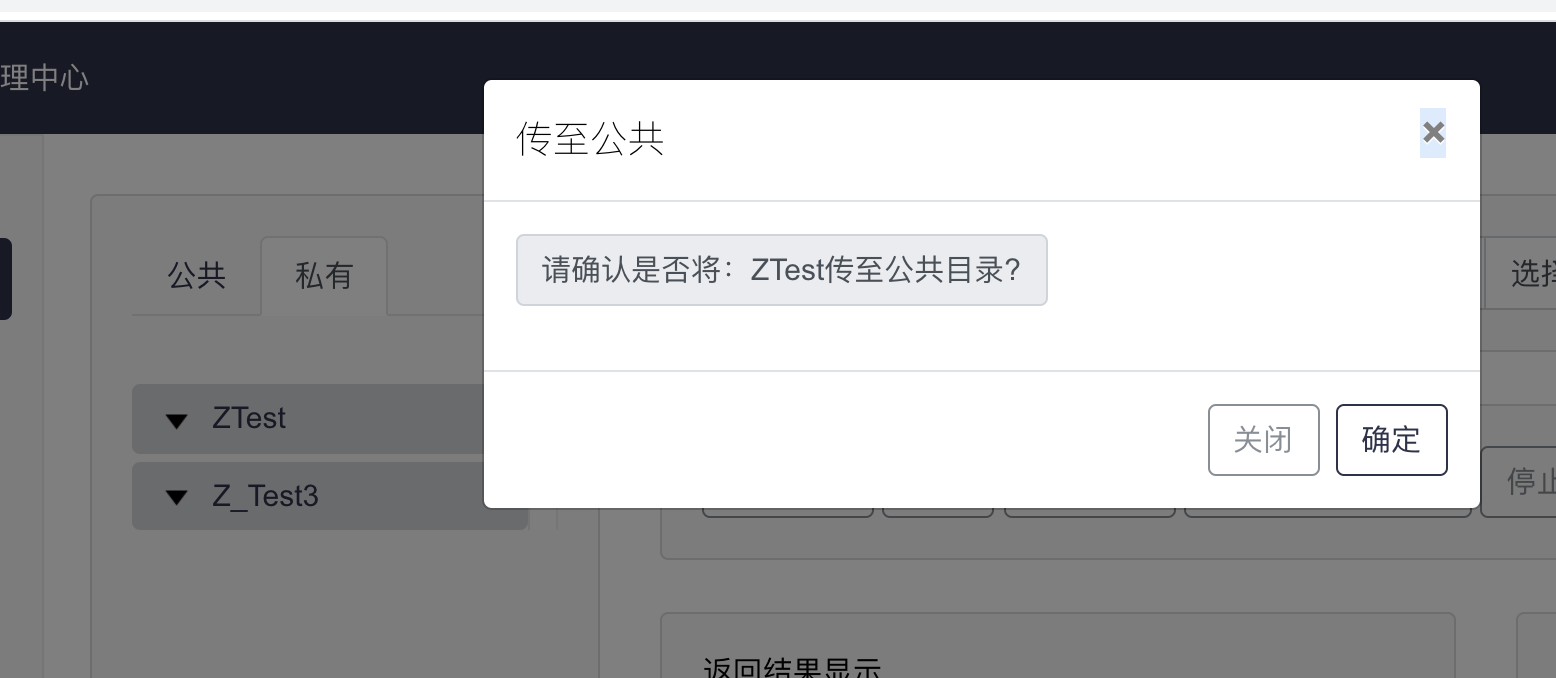
To the public
A drop-down box
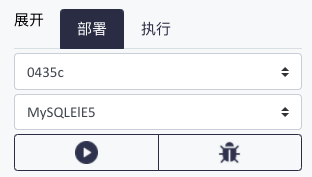
From the four drop-down boxes, you can select the contract status saving mode, started contract instance, cluster where the node resides, and result verification mode.
Button action
Start the
After selecting the contract file in the file list, select “Single Node Execution” in the contract operation mode and click the Start button to launch the specified file and display the return result in the result display box.
The P2P cluster contract is started
After selecting the contract file in the file list, select the contract cluster on which the trusted contract runs in the Contract Run mode and click the Start button to start the specified file on all nodes of the cluster and display the return result in the result display box.
Start all
Select “Single Node Execution” in the contract operation mode and click the “Start All” button to start all contracts in the contract file list.
Stop the P2P cluster contract
Select a contract instance from the drop-down box for started contract instances, select the contract cluster for which the trusted contract runs in Contract Run mode, and click the Stop button to terminate the contract process on all nodes in the cluster.
stop
Selecting a contract instance from the drop-down box for started contract instances and clicking the Stop button will terminate the contract process.
Stop all
Clicking the Stop All button stops all contract instances running on that node.
Static analysis
Select the contract file in the Contract file list, select the contract instance in the Contract instance drop-down box, click the static analysis button, the contract will be static analysis, and the result will be displayed in the result display box.
Distribution of the contract
Select a contract item in the contract file list, select a cluster in Contract operation mode, and click the Distribute contract button. The contract item will be packaged as YPK and distributed to all nodes in the cluster.
Returns the result
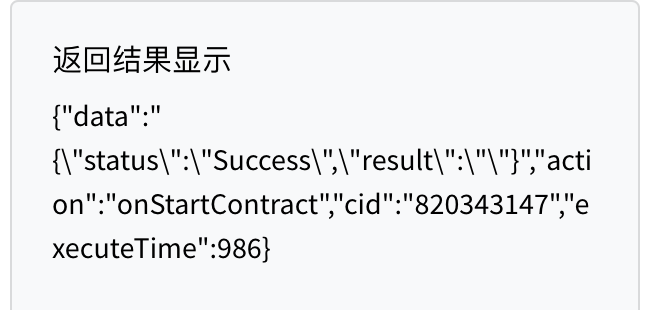
The Return Result display displays the return results of some operations.
Contract Permission Configuration
After starting the contract, if the current user’s role can view the started contract process, the IO permissions for the current contract will be displayed in the bottom right when the process is selected. 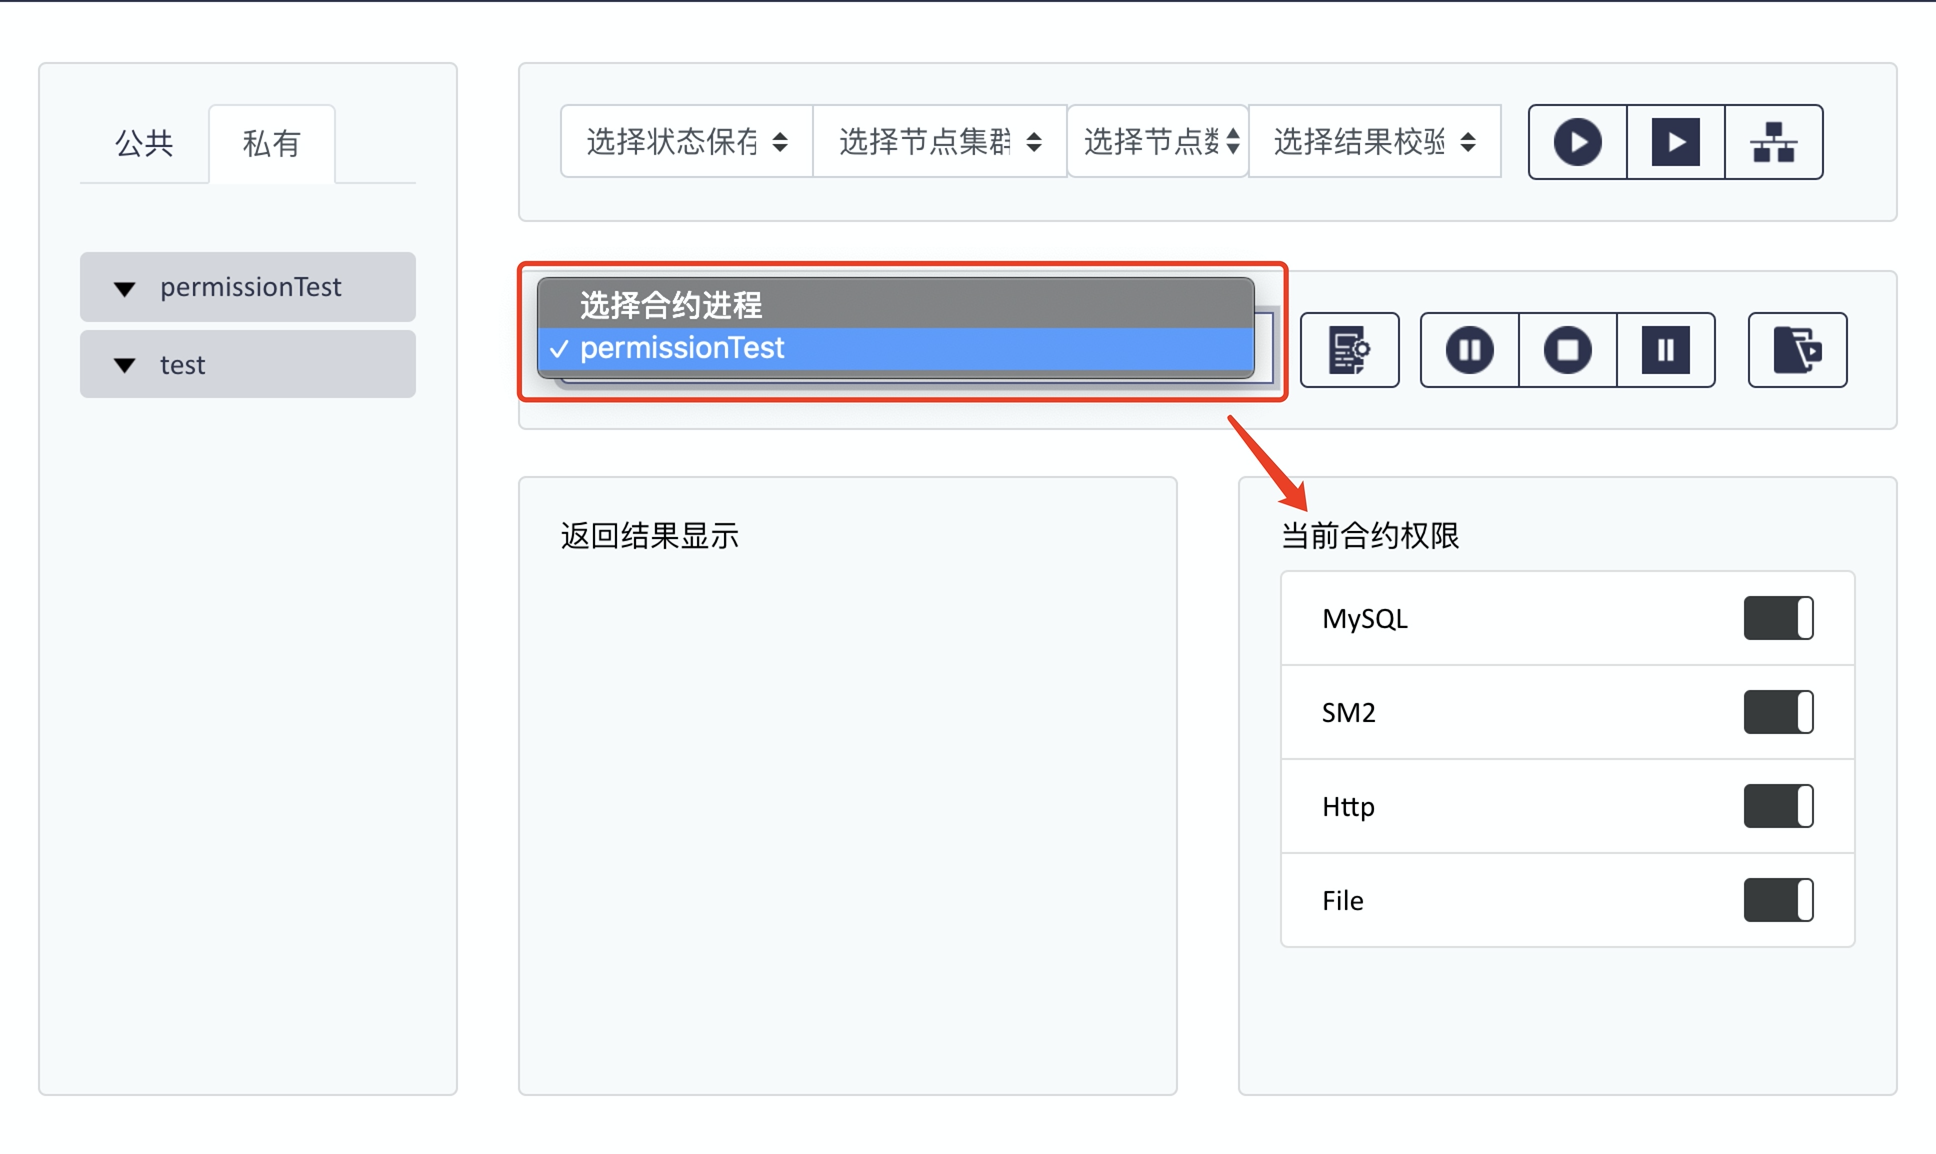
If the selected contract does not have I/O permission, the following message is displayed in the current permission display box: The current contract does not have IO permission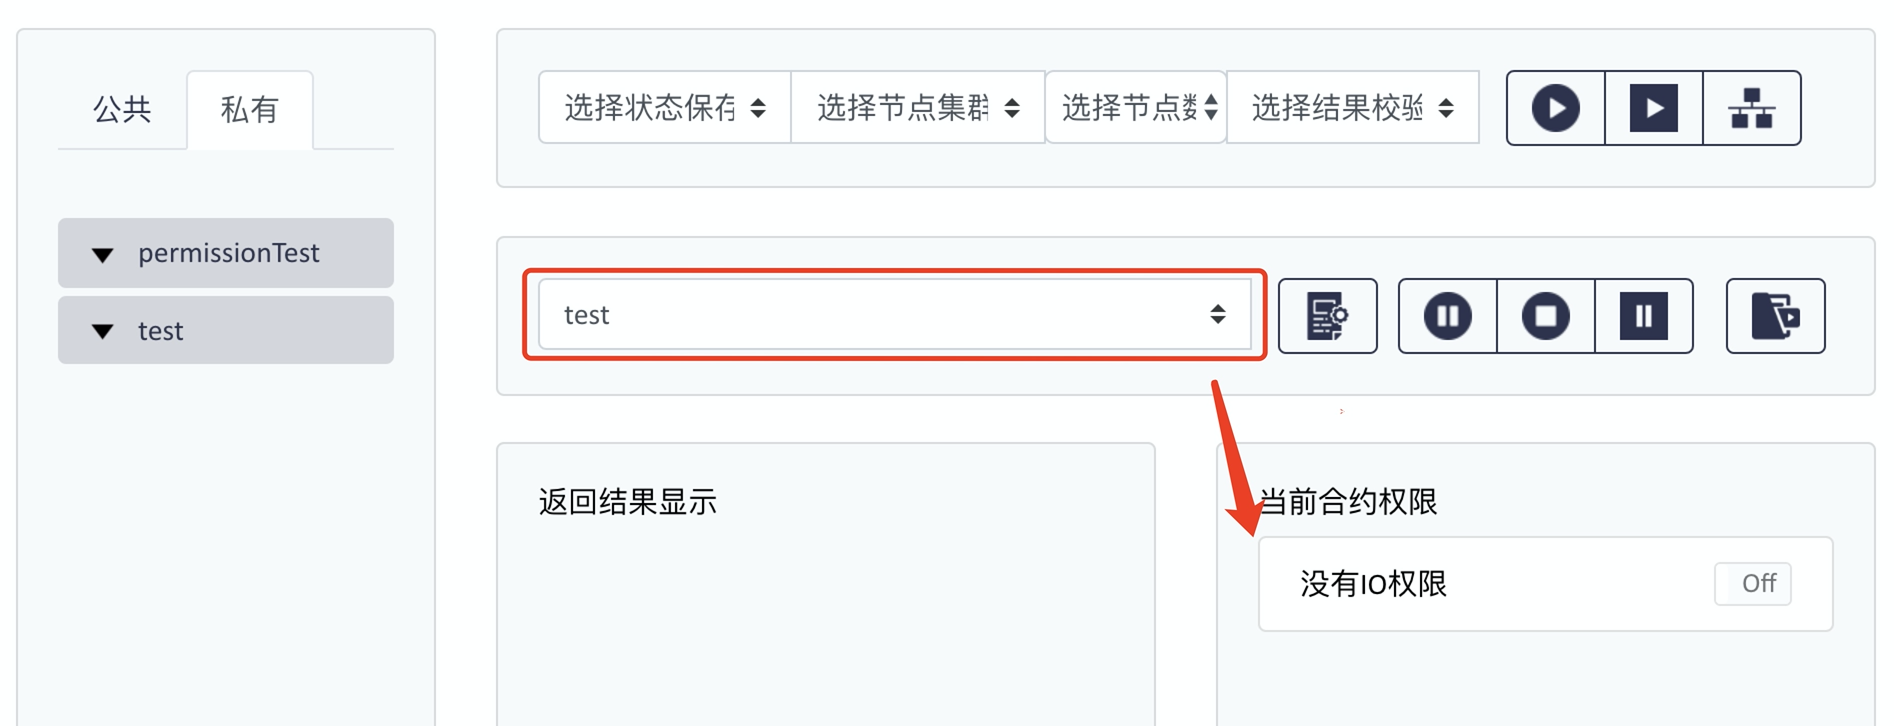
If the current user is a contract administrator, you can modify the existing contract I/O permissions. The system will prompt that the contract may not run normally after modification. If you still want to cancel, click , otherwise click .
After clicking Close or open, the next time the process views the same contract code, it will display the IO permission after the last modification by default. 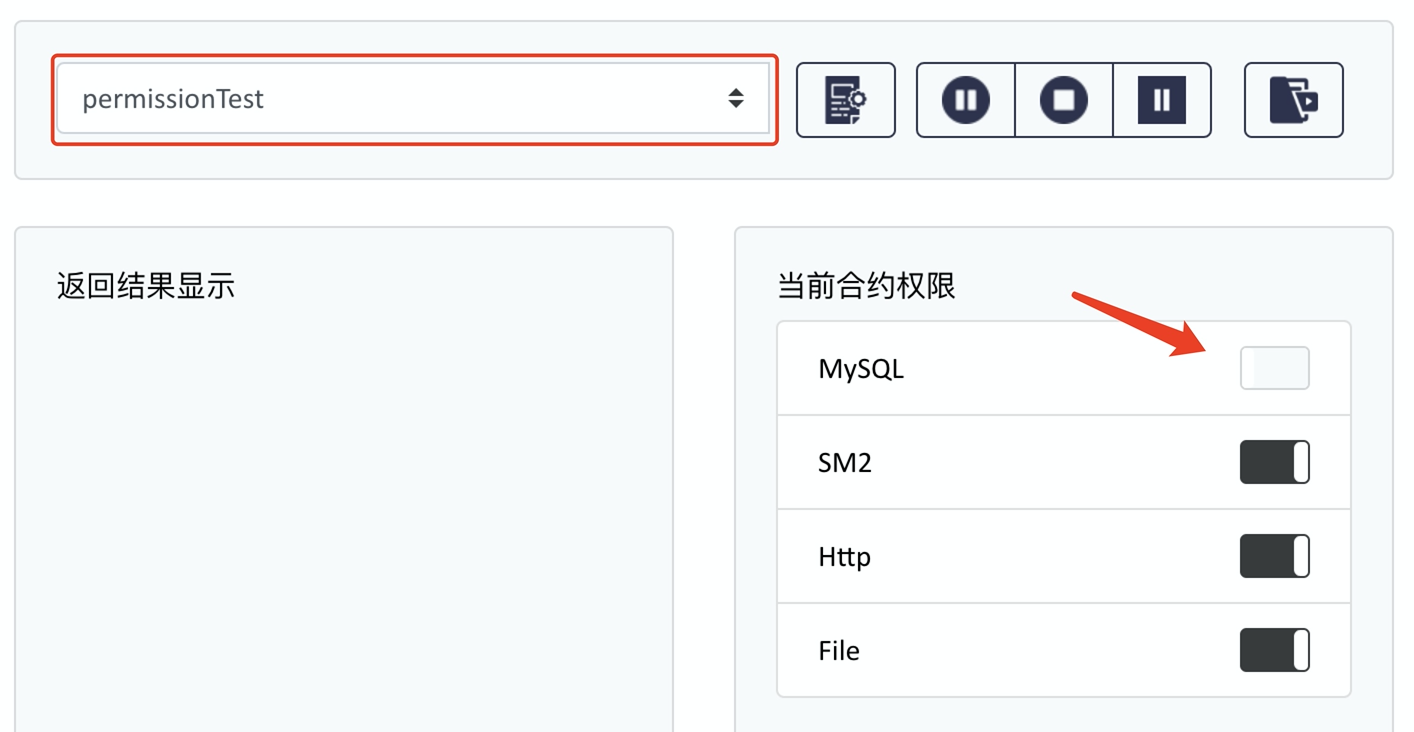
Contract instance management menu
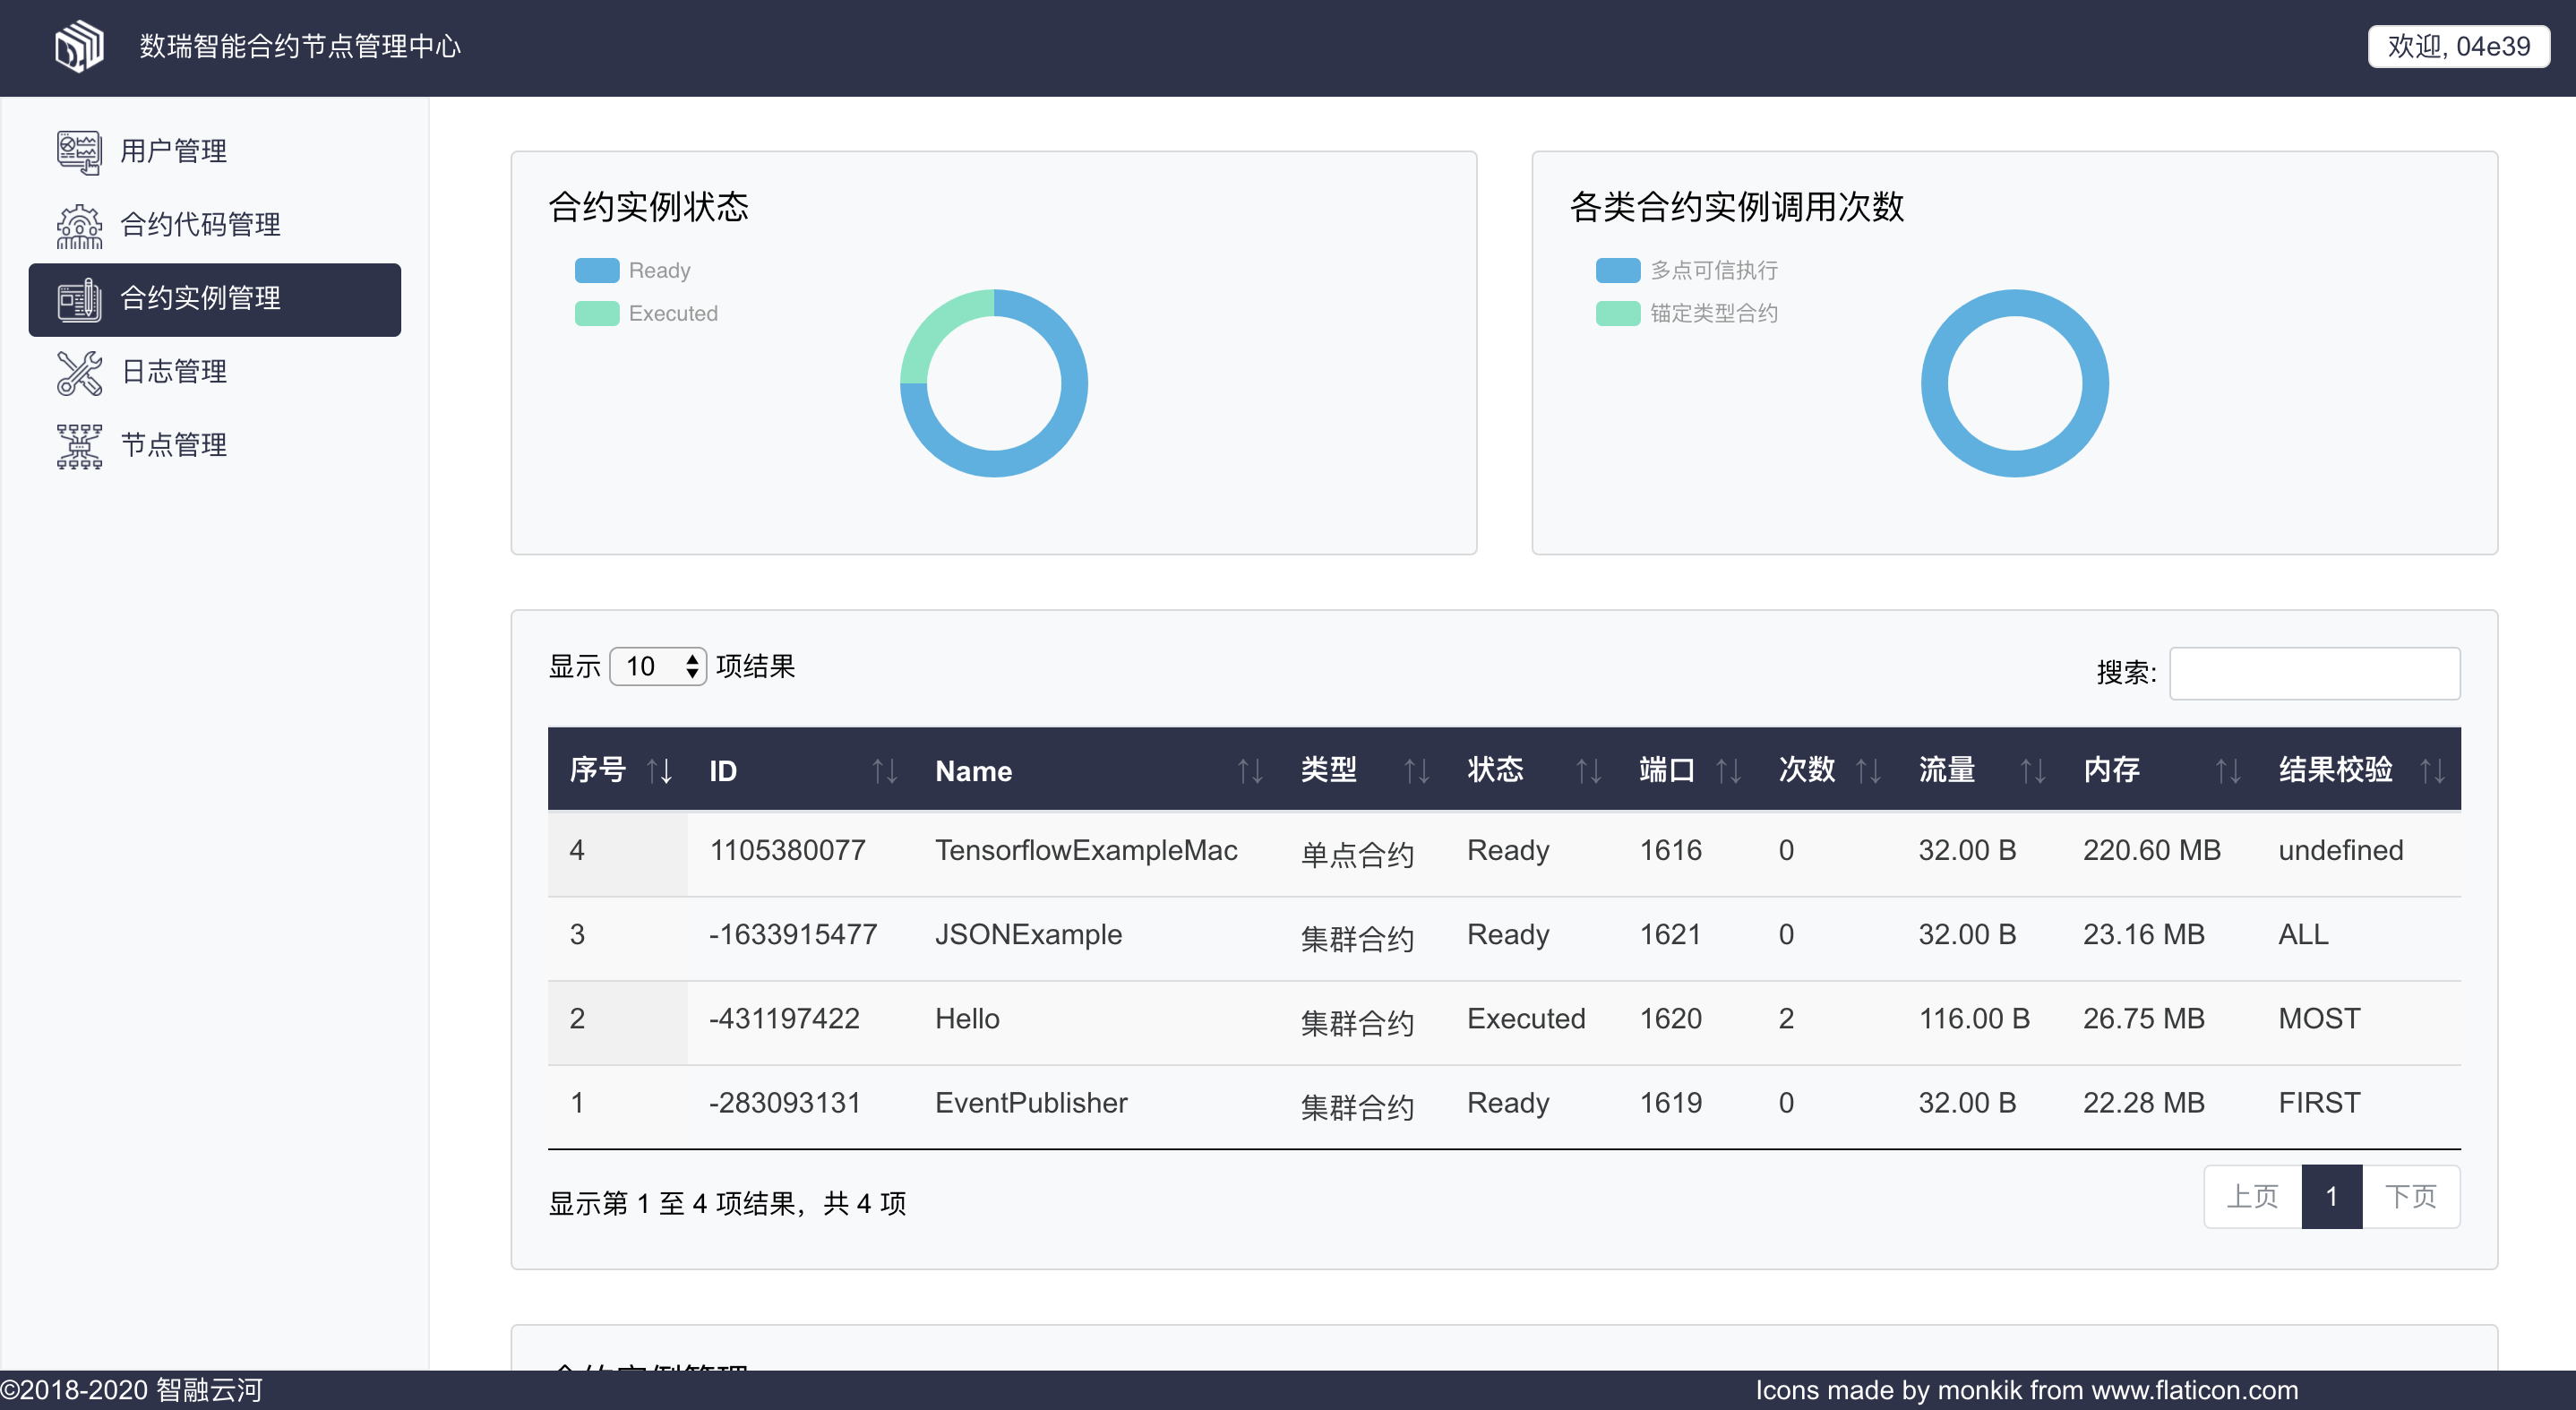
The contract instance management menu displays all the current contract instances of this node. Users can view the status of the contract instance and execute or migrate the status of the contract instance.
List of Contract instances
This list shows all the contract instance information of the current node, including the contract ID, contract name, contract type, contract status, contract process port, contract call times, contract traffic, and contract memory usage, and the result verification mode of the cluster contract.
Contract instance execution
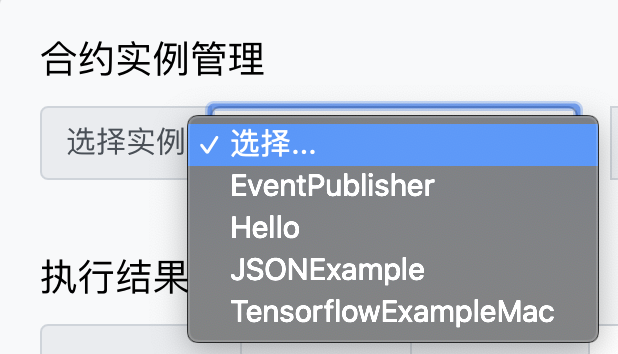
Users can select a contract instance in the contract instance selection drop-down box to operate on the contract instance.
After selecting the contract instance, the user can select the method name of the contract from the “Methods” drop-down box, enter the method parameters in the “Parameters” input box, and click “Execute ”.
Users can also click on “Dynamic Analysis Execution” to perform an execution with dynamic analysis results.
If the contract is a single point contract, the contract is executed at a single point; If the contract is a cluster contract, the contract is executed on all nodes in the cluster.
Contract instance execution result
The execution result of the contract instance is displayed in the Execution Result area, including the execution ID, execution success/failure, execution time, and execution result.
If the execution mode of the contract is Dynamic Analysis execution, in addition to the execution result, the dynamic analysis result of the execution is displayed in the result box.
Contract status migration
For the contract instances that support manual migration, users can click “Local State Save” to save the state of the contract instance, or select the saved contract instance from the TimeTravel list of the contract to migrate the contract state to the corresponding time.
Log Management Menu
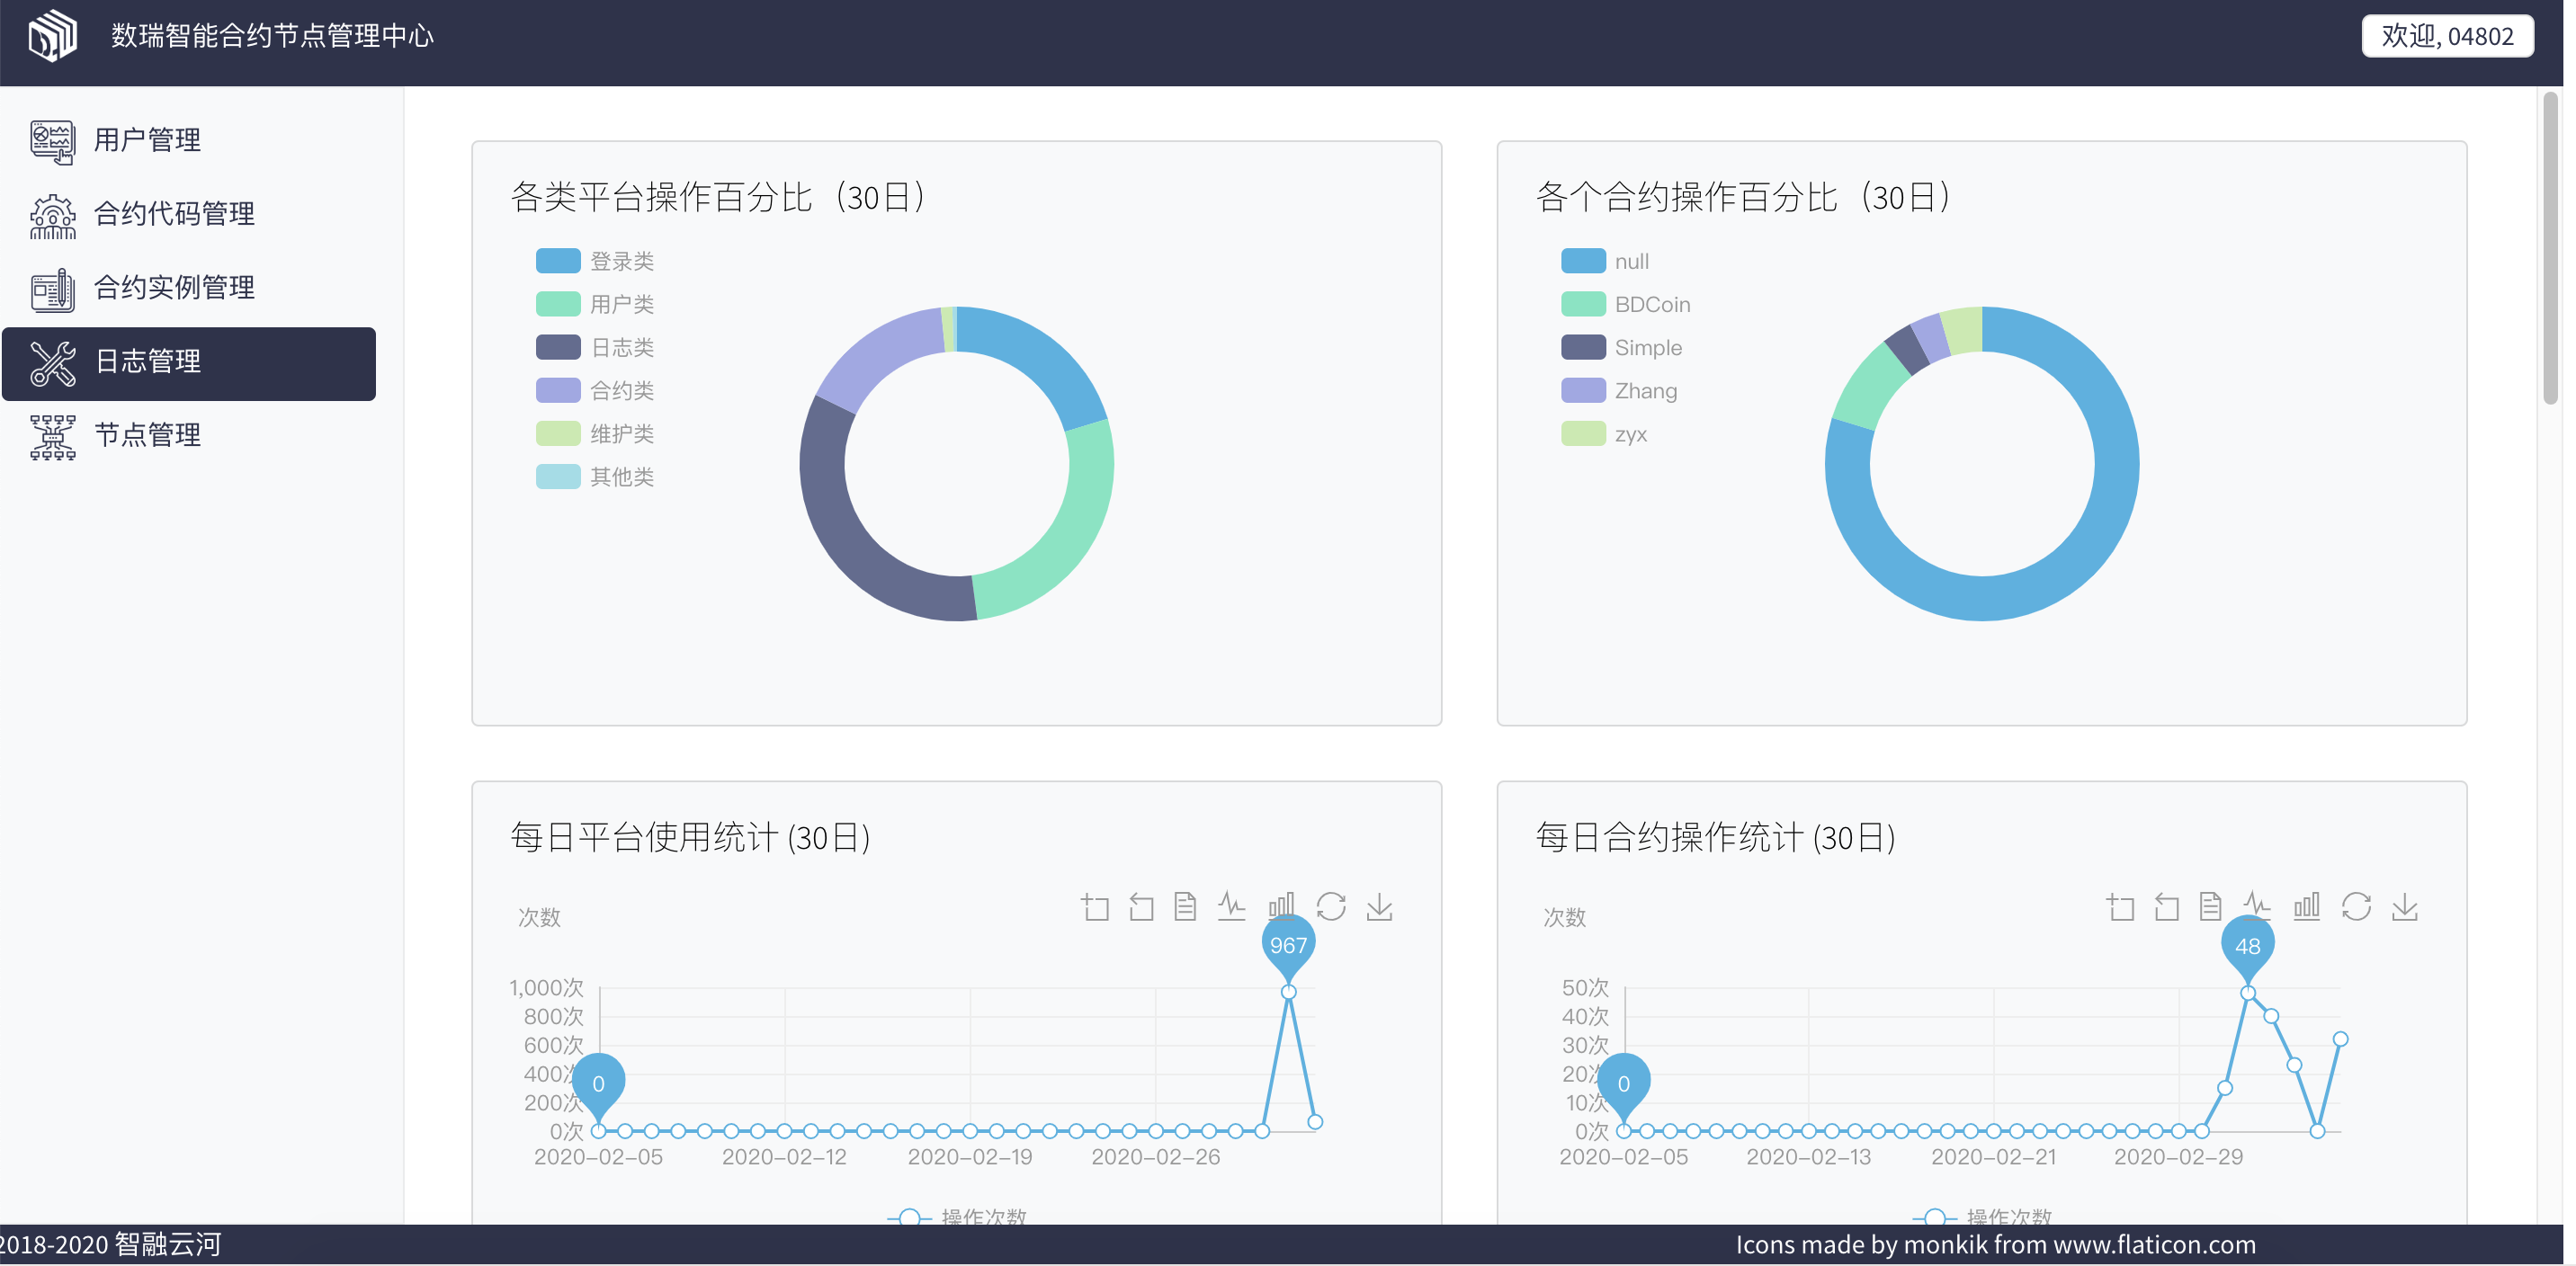
This menu displays the statistics of local node logs and contract logs of the node.
Node administrators can view node log data. The contract manager and contract user can view the local contract log data of the node.
Log Statistics View
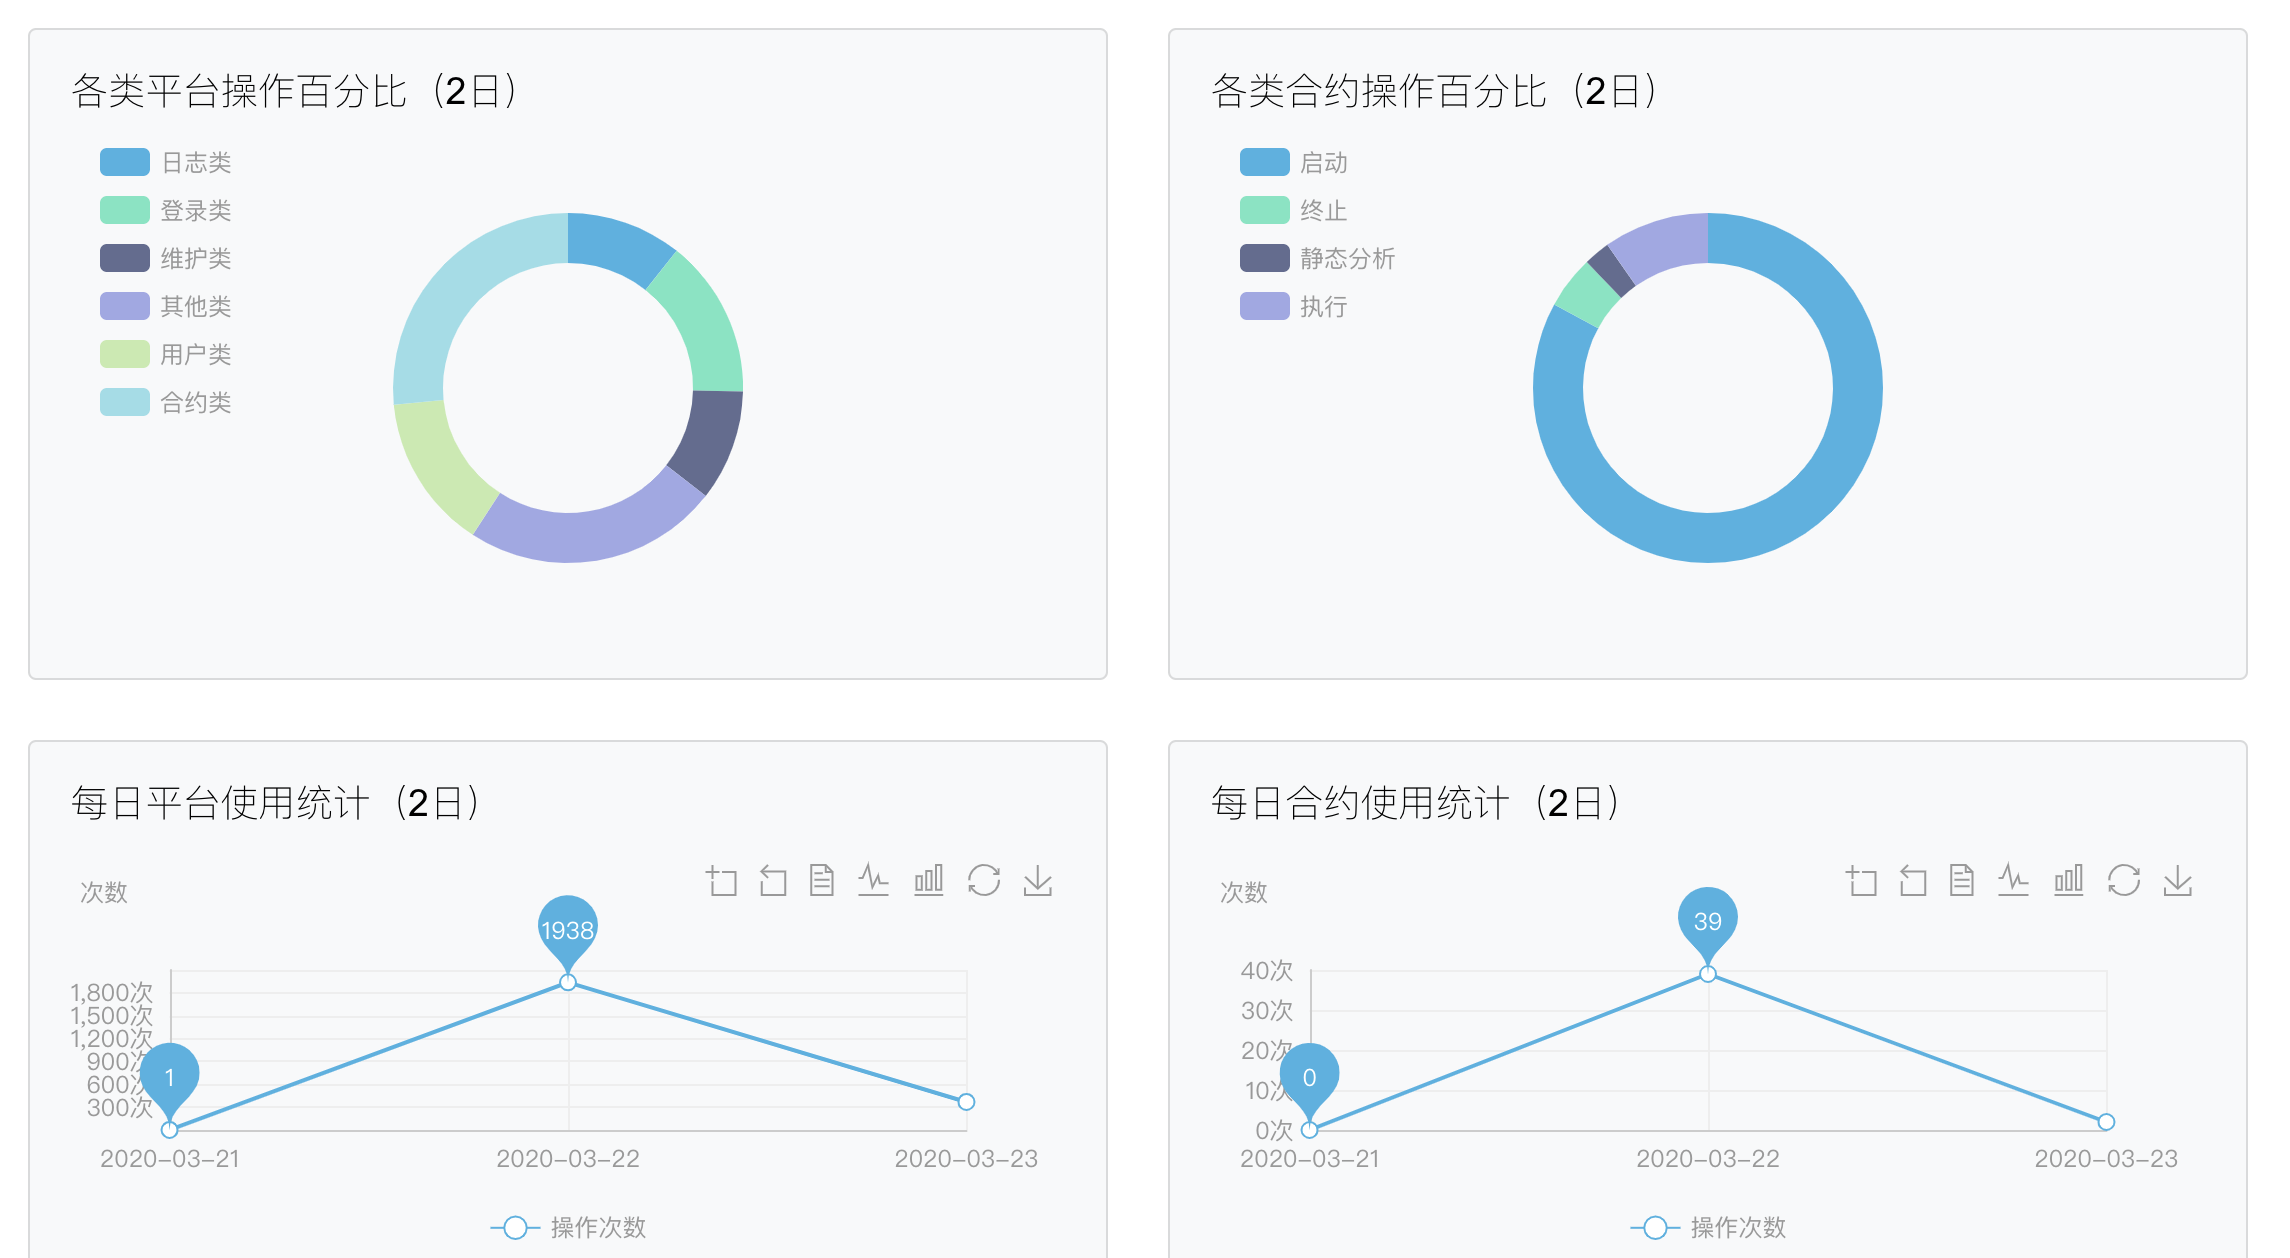
Operating percentage of various platforms
By default, this chart shows the pie chart of the proportion of various platform operations in the last two days, in which platform operations are divided into six categories: login, user, log, contract, maintenance and others. You can enter the desired log time range in the upper right corner of the node log details. After the time range is changed, the operation percentage of each platform is updated.
Operating percentage of each type of contract
Contract operations are divided into four categories: start, end, static analysis and execution. The pie chart shows the proportion of each type of contract operation in the last 2 days. You can enter the desired log time range in the upper right corner of the contract log details. After the time range is modified, the operation percentage of each contract is updated.
Daily platform usage statistics
The figure is a broken line chart of the number of platform operations in the last 2 days. You can enter the desired log time range in the time range box in the upper right corner of node log details. After the time range is changed, the daily platform usage statistics line chart is updated.
Daily contract usage statistics
The figure is a broken line chart of the number of operations performed on the node in the last two days. You can enter the desired log time range in the time range box in the upper right corner of the contract log details. After modification, the daily contract usage statistics line chart will be updated.
Log details
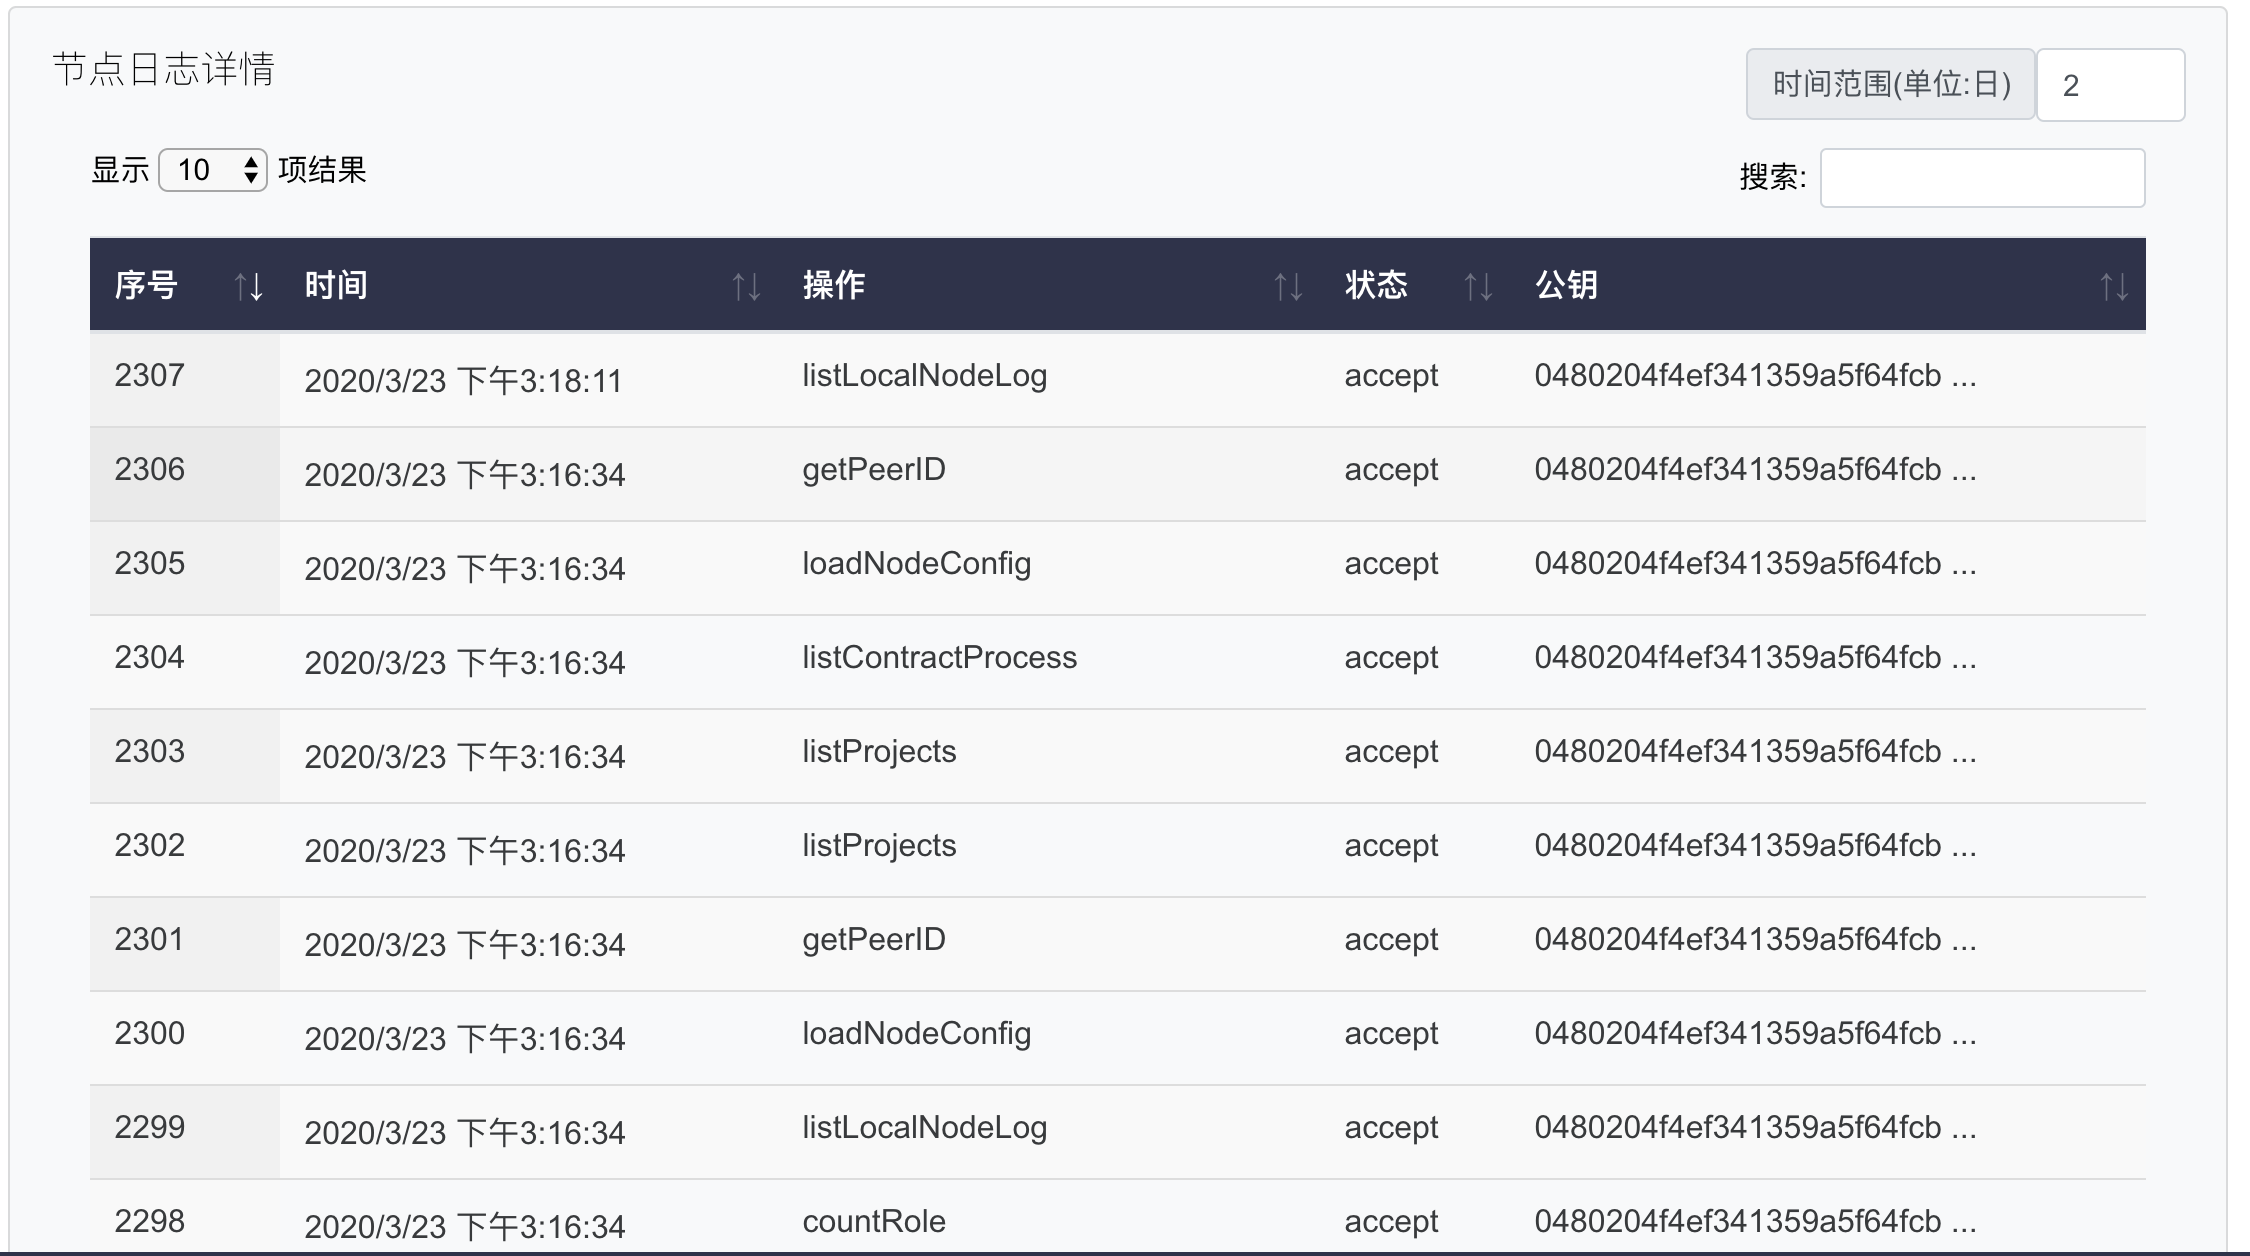
Node Log Details
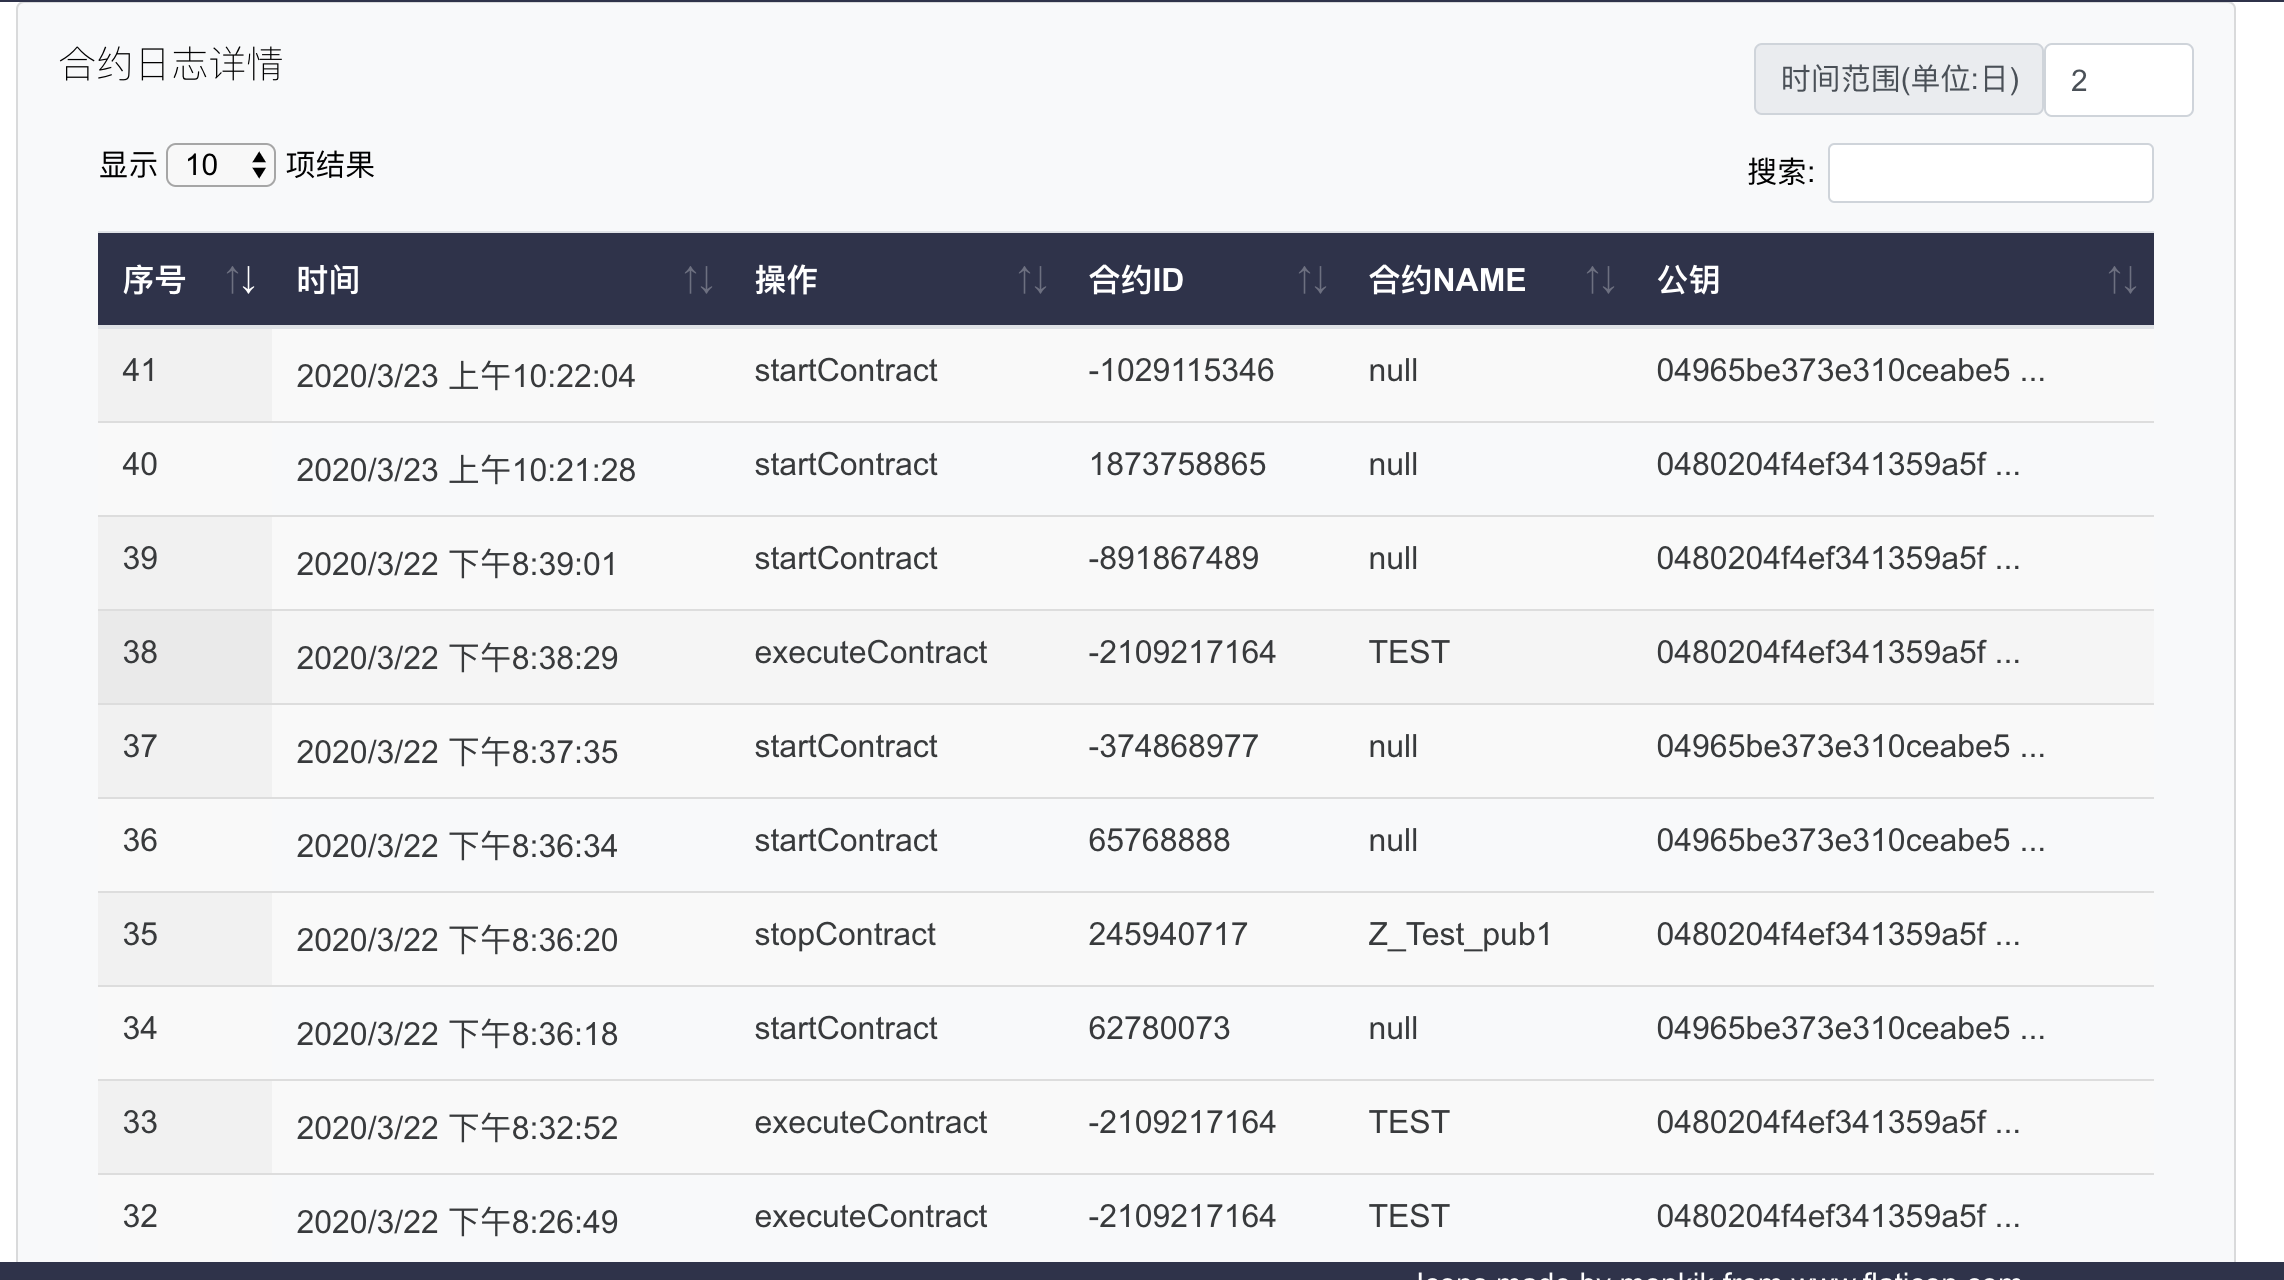
The node log details table displays all data in node logs. You can click the relevant button in the table to sort the log data in different ways, and enter keywords in the upper right corner of the table to search for relevant logs. You can enter the desired log time range in the time range box in the upper right corner. After the log time range is modified, the operation percentage of each platform and daily platform usage statistics are updated simultaneously.
Contract Log Details
The contract log details table is a display of all the data in the contract log. You can click the relevant button in the table to sort the log data in different ways, and enter keywords in the upper right corner of the table to search for relevant logs. You can enter the desired log time range in the time range box at the upper right corner. After the change, the operation percentage of each type of contract and the daily contract usage statistics are updated simultaneously.
Node Management Menu
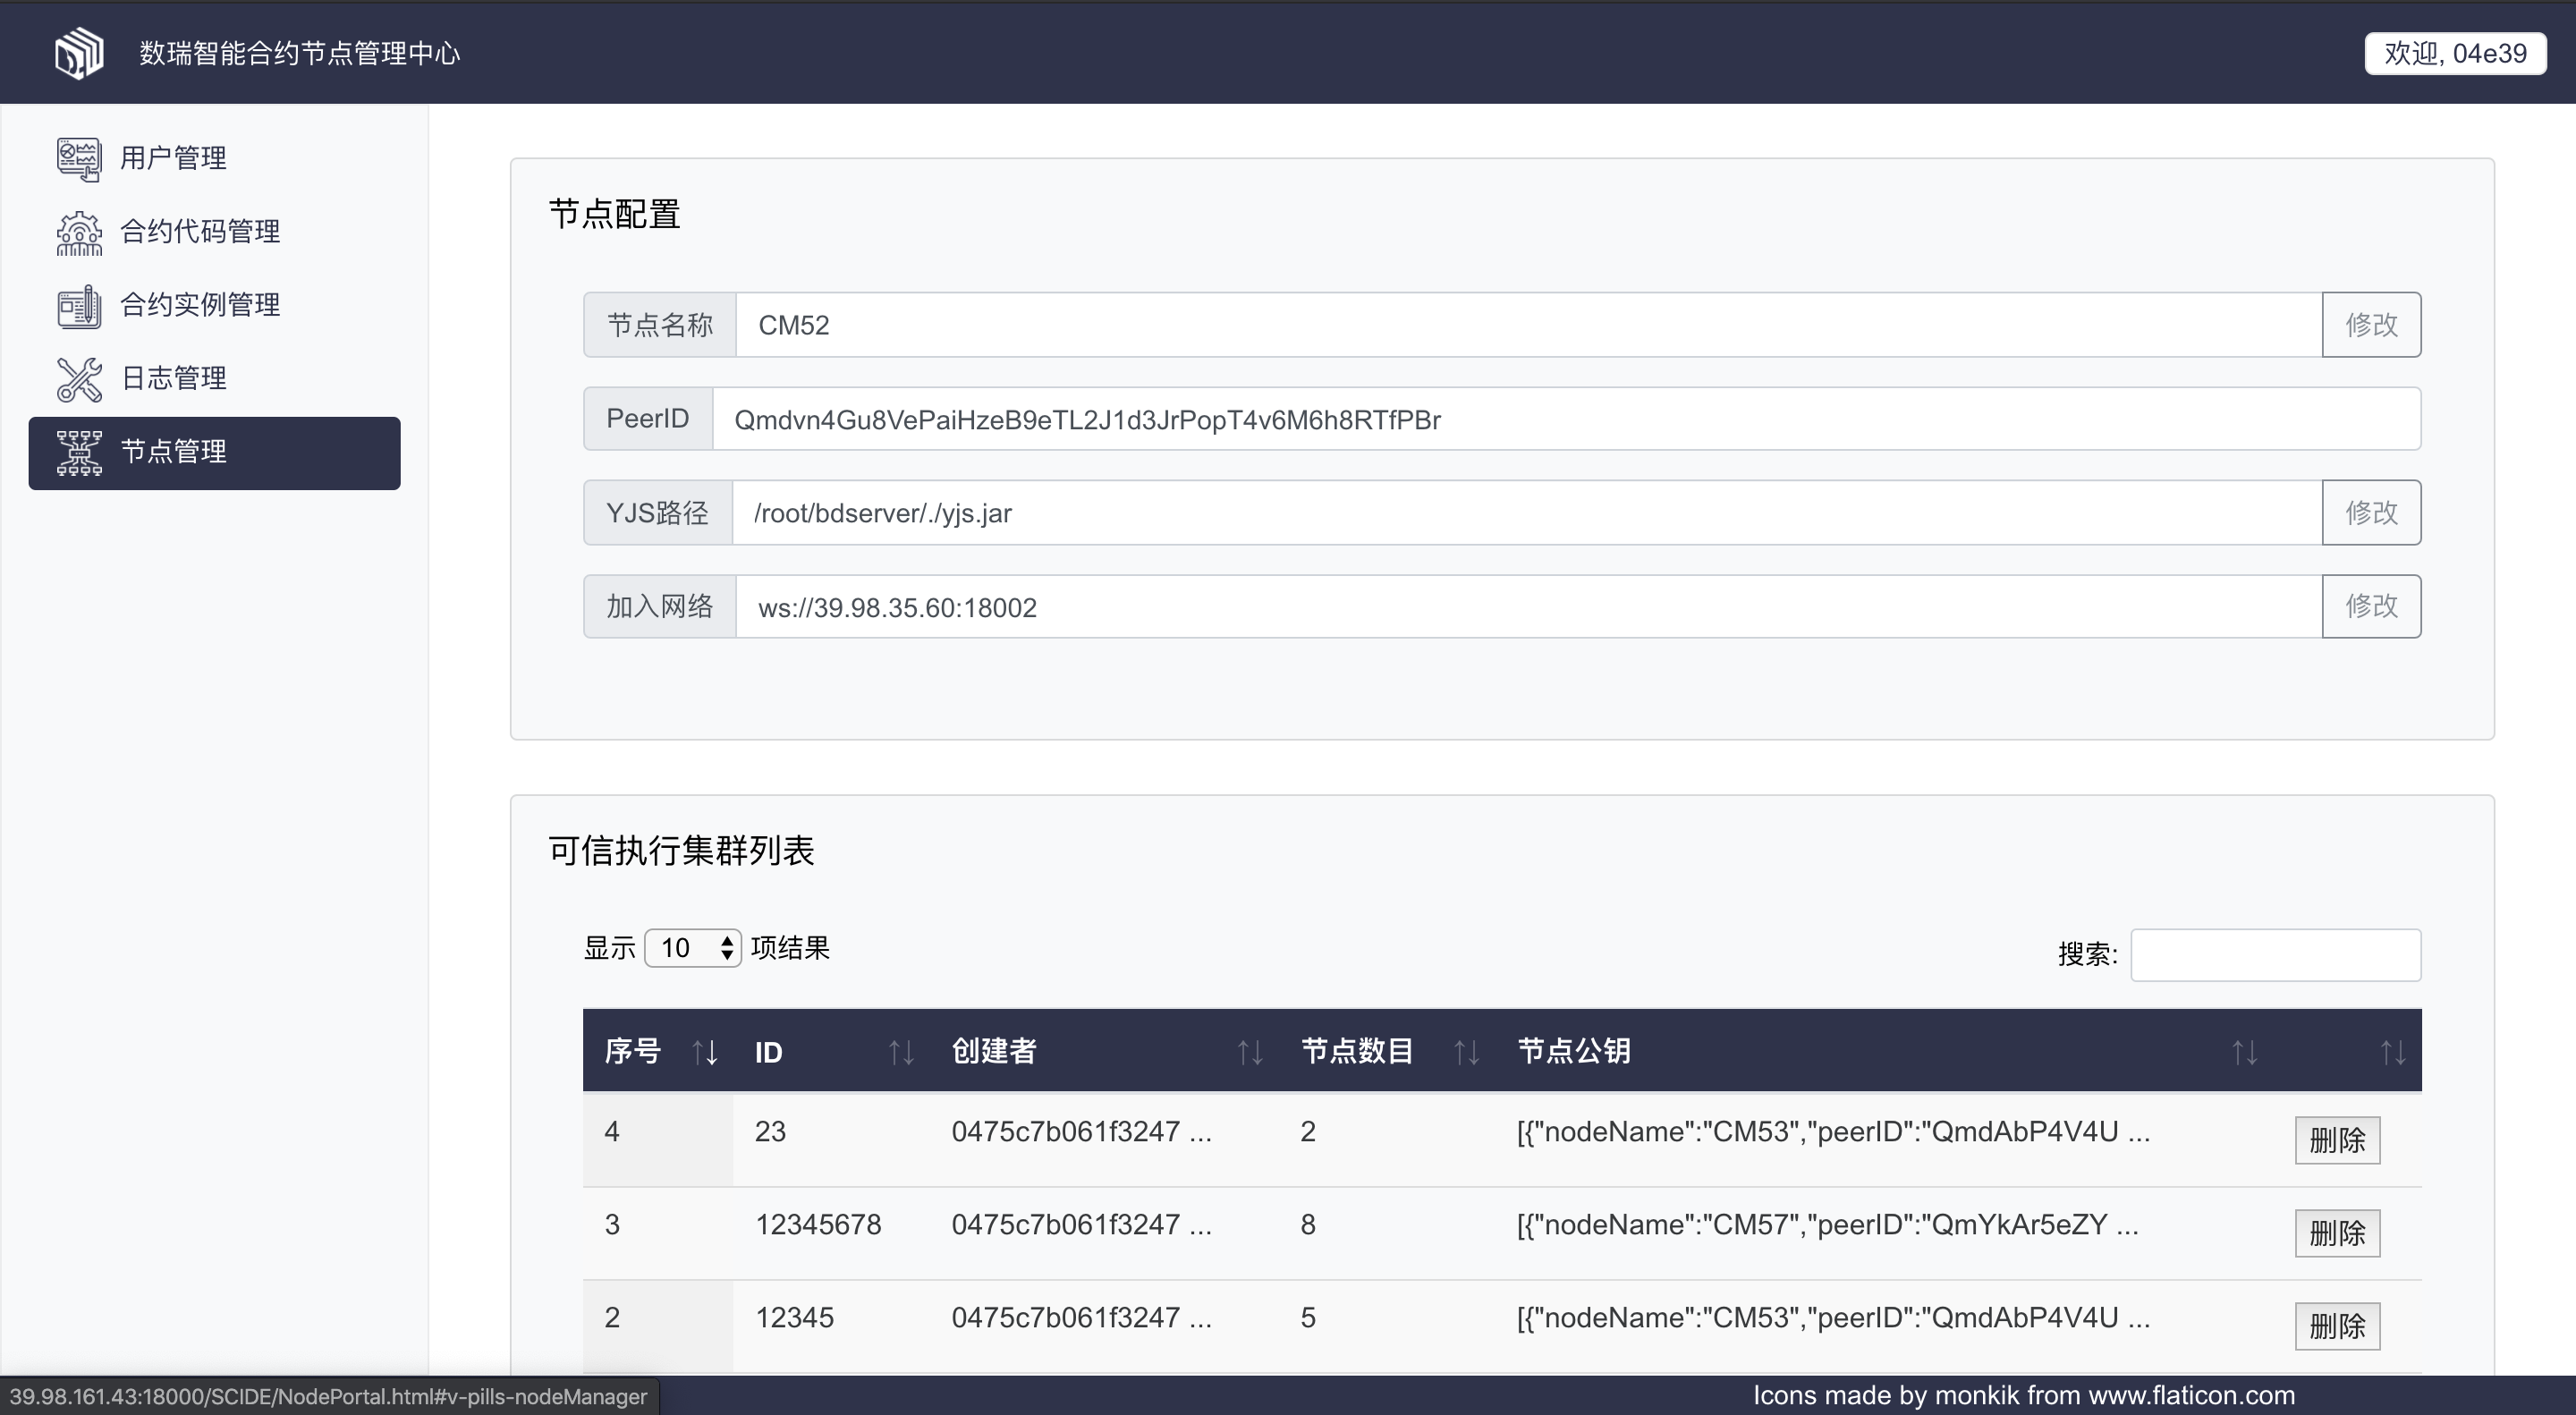
The node management menu displays the configuration information about the node and its trusted execution cluster.
Node configuration
The node administrator can view the configuration information of the node, including the node name, YJS path, and network center node of the node. The node administrator can also modify the configurations.
If the node administrator changes the network center of the node, the node tries to change the connection again, and the entire page is refreshed and reloaded.
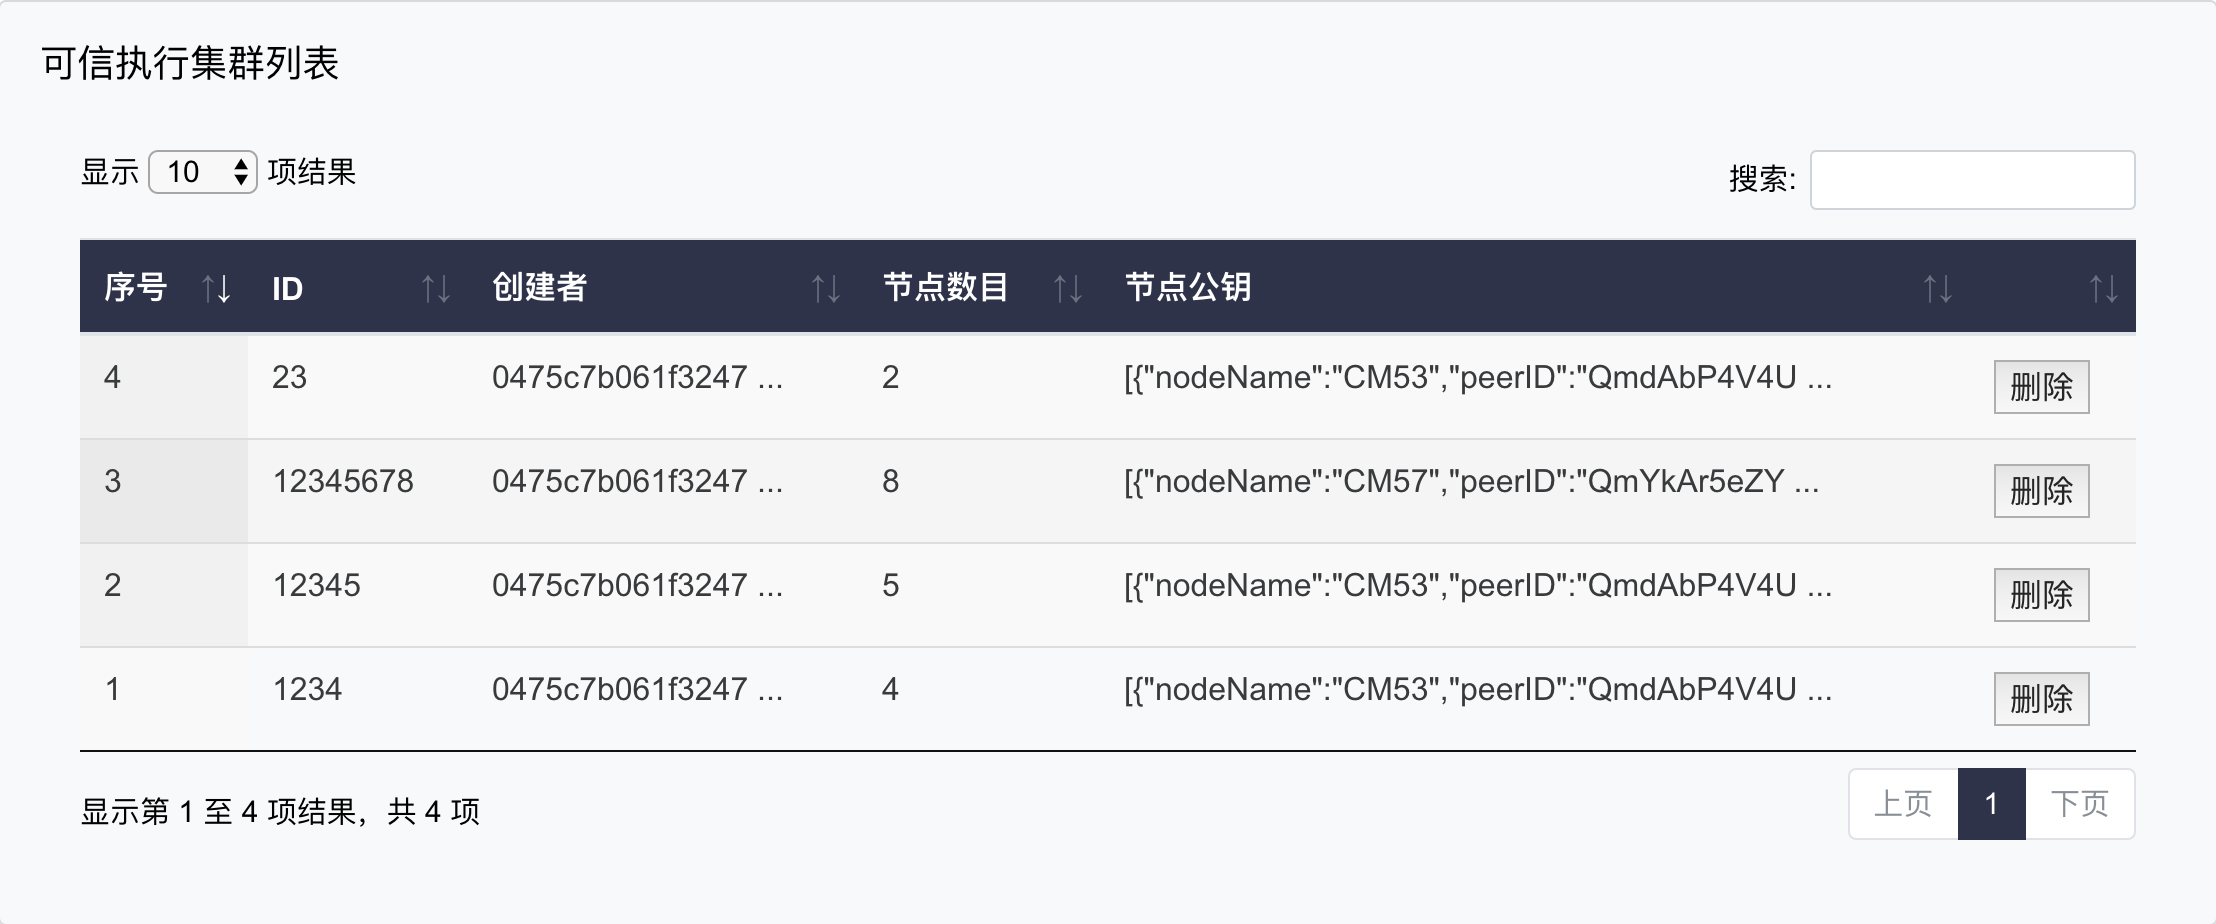
Node trusted execution cluster list
A node administrator can view information about the trusted execution cluster to which a node belongs, including the cluster creator, cluster ID, number of nodes in the cluster, and information about nodes in the cluster.
Node License Configuration
You can view the node’s license and expiration time, apply for and upload a license, and save the node UUID.
Smart Contract online editor
Users and Accounts
Create account
Apply for authorization
Create a project
The new file
Upload a file
Start the contract
Normal mode Click the startup button on the left to start the contract in normal mode.
Debug mode Click the Debug button on the right to start the contract in debug mode. The current convention returns an example of the return result from the normal mode contract document when the debug mode contract is invoked via executeContract.
Call the contract
# Generate document 
After starting the contract, click the “Generate document” button to call the contract and return the Result through @description / @param / @result of each export function, so as to generate the contract Description document.
Route access management interface
Permission application and authorization
The dashboard
The dashboard provides an overview of the number of users, contracts, and nodes in the admittance node.
The overall view
 It is divided into four modules. One module is the overview of the number of users, contracts and nodes, and then the detailed statistics of the three quantities.
The number of nodes
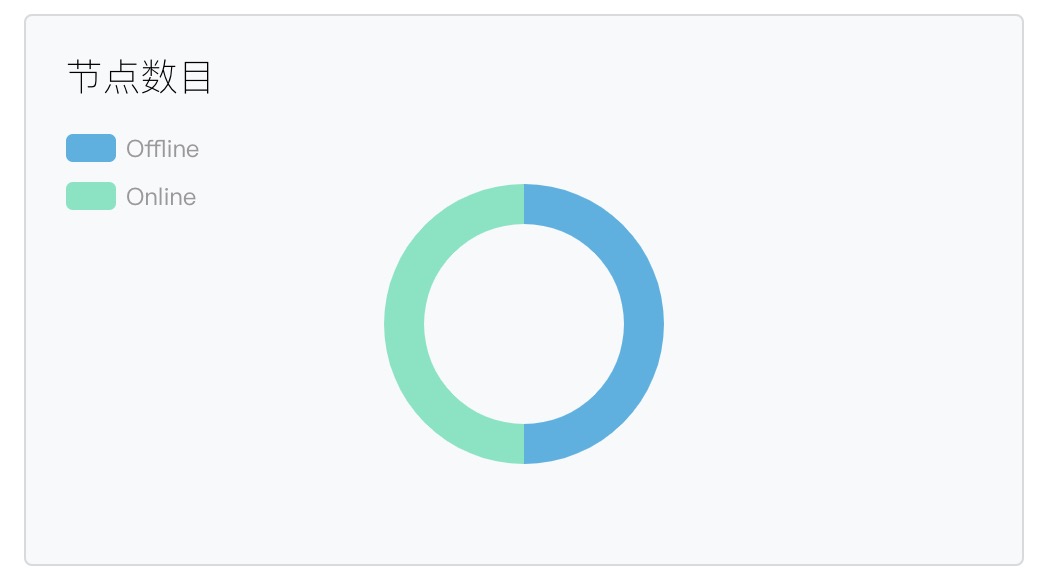 Collect statistics about the current online and offline nodes
User Type Distribution
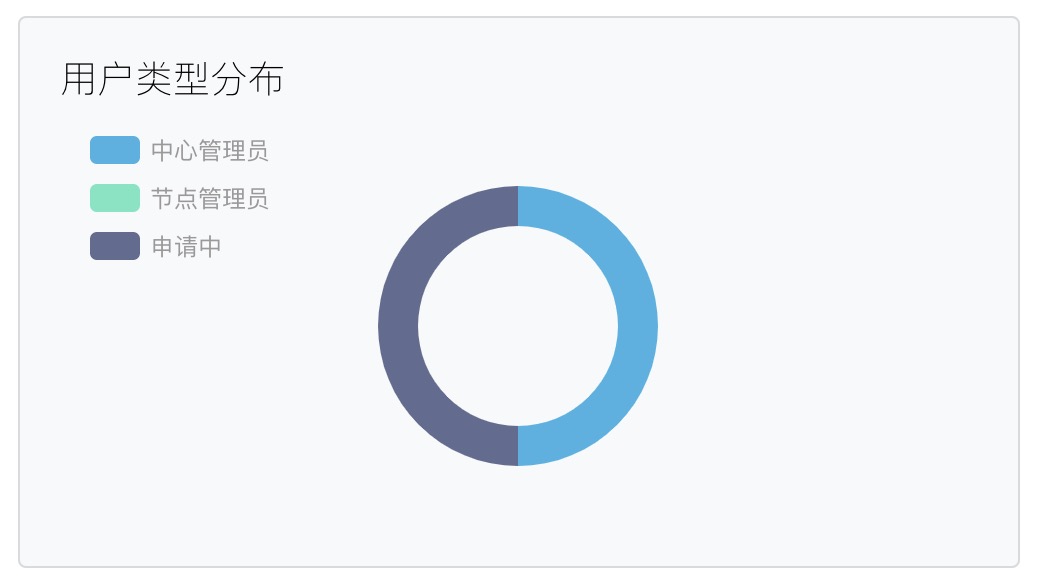 Number of node administrators and admission administrators in the network where the current admitted node resides, and number of nodes to be applied for
Contract invocation condition
 Broken line statistics of events, multi-point execution, WS call, and Http call in all contracts in the network where the current access node resides.
User management
User management allows login users to view the current user distribution and user active statistics.
An overview of
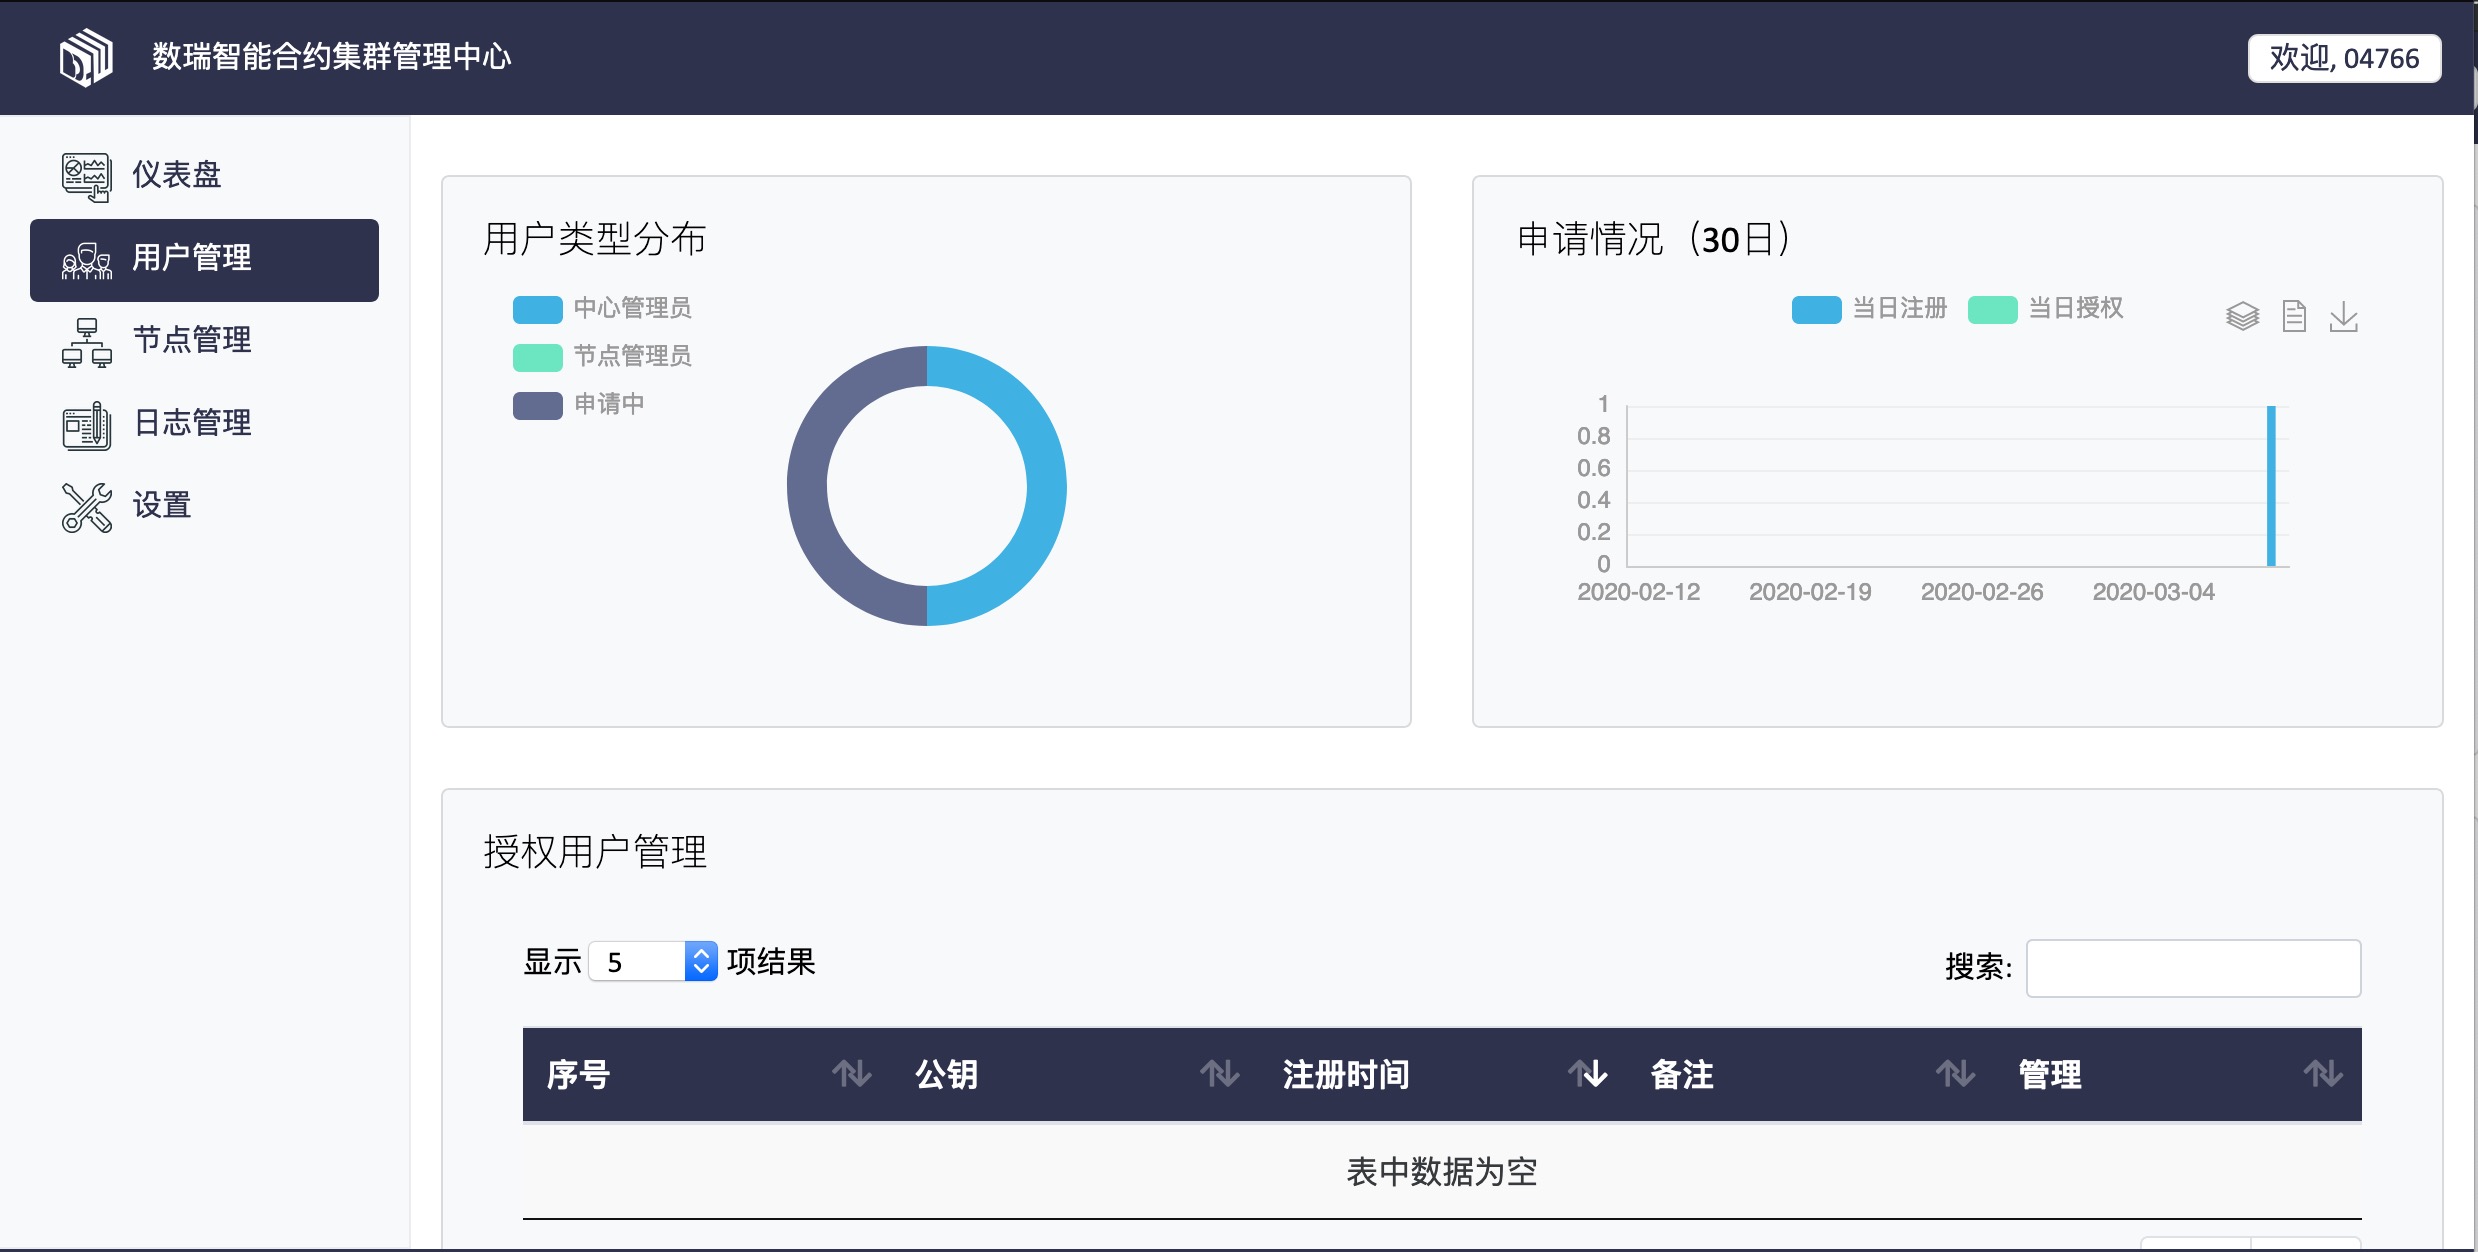 The user management page consists of four modules.
User Type Distribution
Main Statistics on the number of node administrators in the network managed by the center administrator, the number of center administrators, and the number of applied node administrators 
Statistics of applications made within 30 days
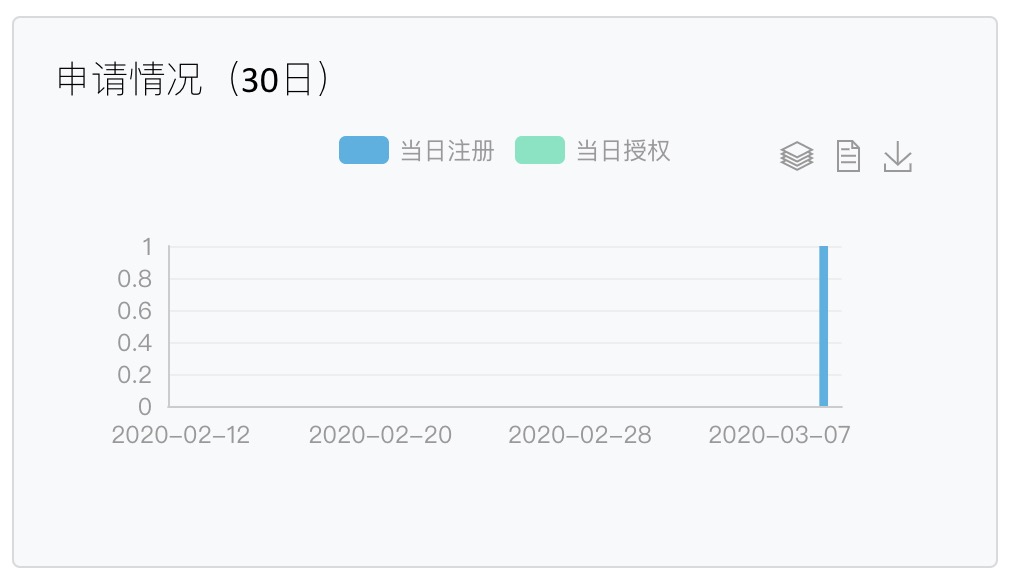 Calculates the number of node administrators who apply for and are authorized to become node administrators within 30 days
Current User Information
- In this text box, you can view the public and private keys of the current user. If other users want to use their public and private keys to log in to the center administrator interface, they can copy their public and private keys to this text box.
- After copying your public and private keys, click Import the public key to add the public key to the central administrator
- The first five public keys are displayed in Local public key. If you select your own public key, the role of the selected public key is displayed in My permission. If you are a central administrator, you have all the rights of the central administrator.
- If you are not a center administrator or node administrator and want to join the network of the current center administrator, you can select the node administrator in the following box and run Role of certification.
List of authorized and unauthorized users
After applying for the current user information of the center administrator, the center administrator will see the application information with the public key in the form. If you agree, click . If you disagree, click , and the application is invalid.
 After authorization, you will see a list of authorized nodes in the Authorized User Management table. If the central administrator wants to remove a role of a node administrator, select the role in the authorized user management list and click delete to delete the selected role.
Node management
Node management is a page on which the Manager manages the Cluster nodes connected to it, visible only to Manager administrators and contract managers. Manager Administrators and contract managers can view node information and manage trusted execution clusters.
An overview of
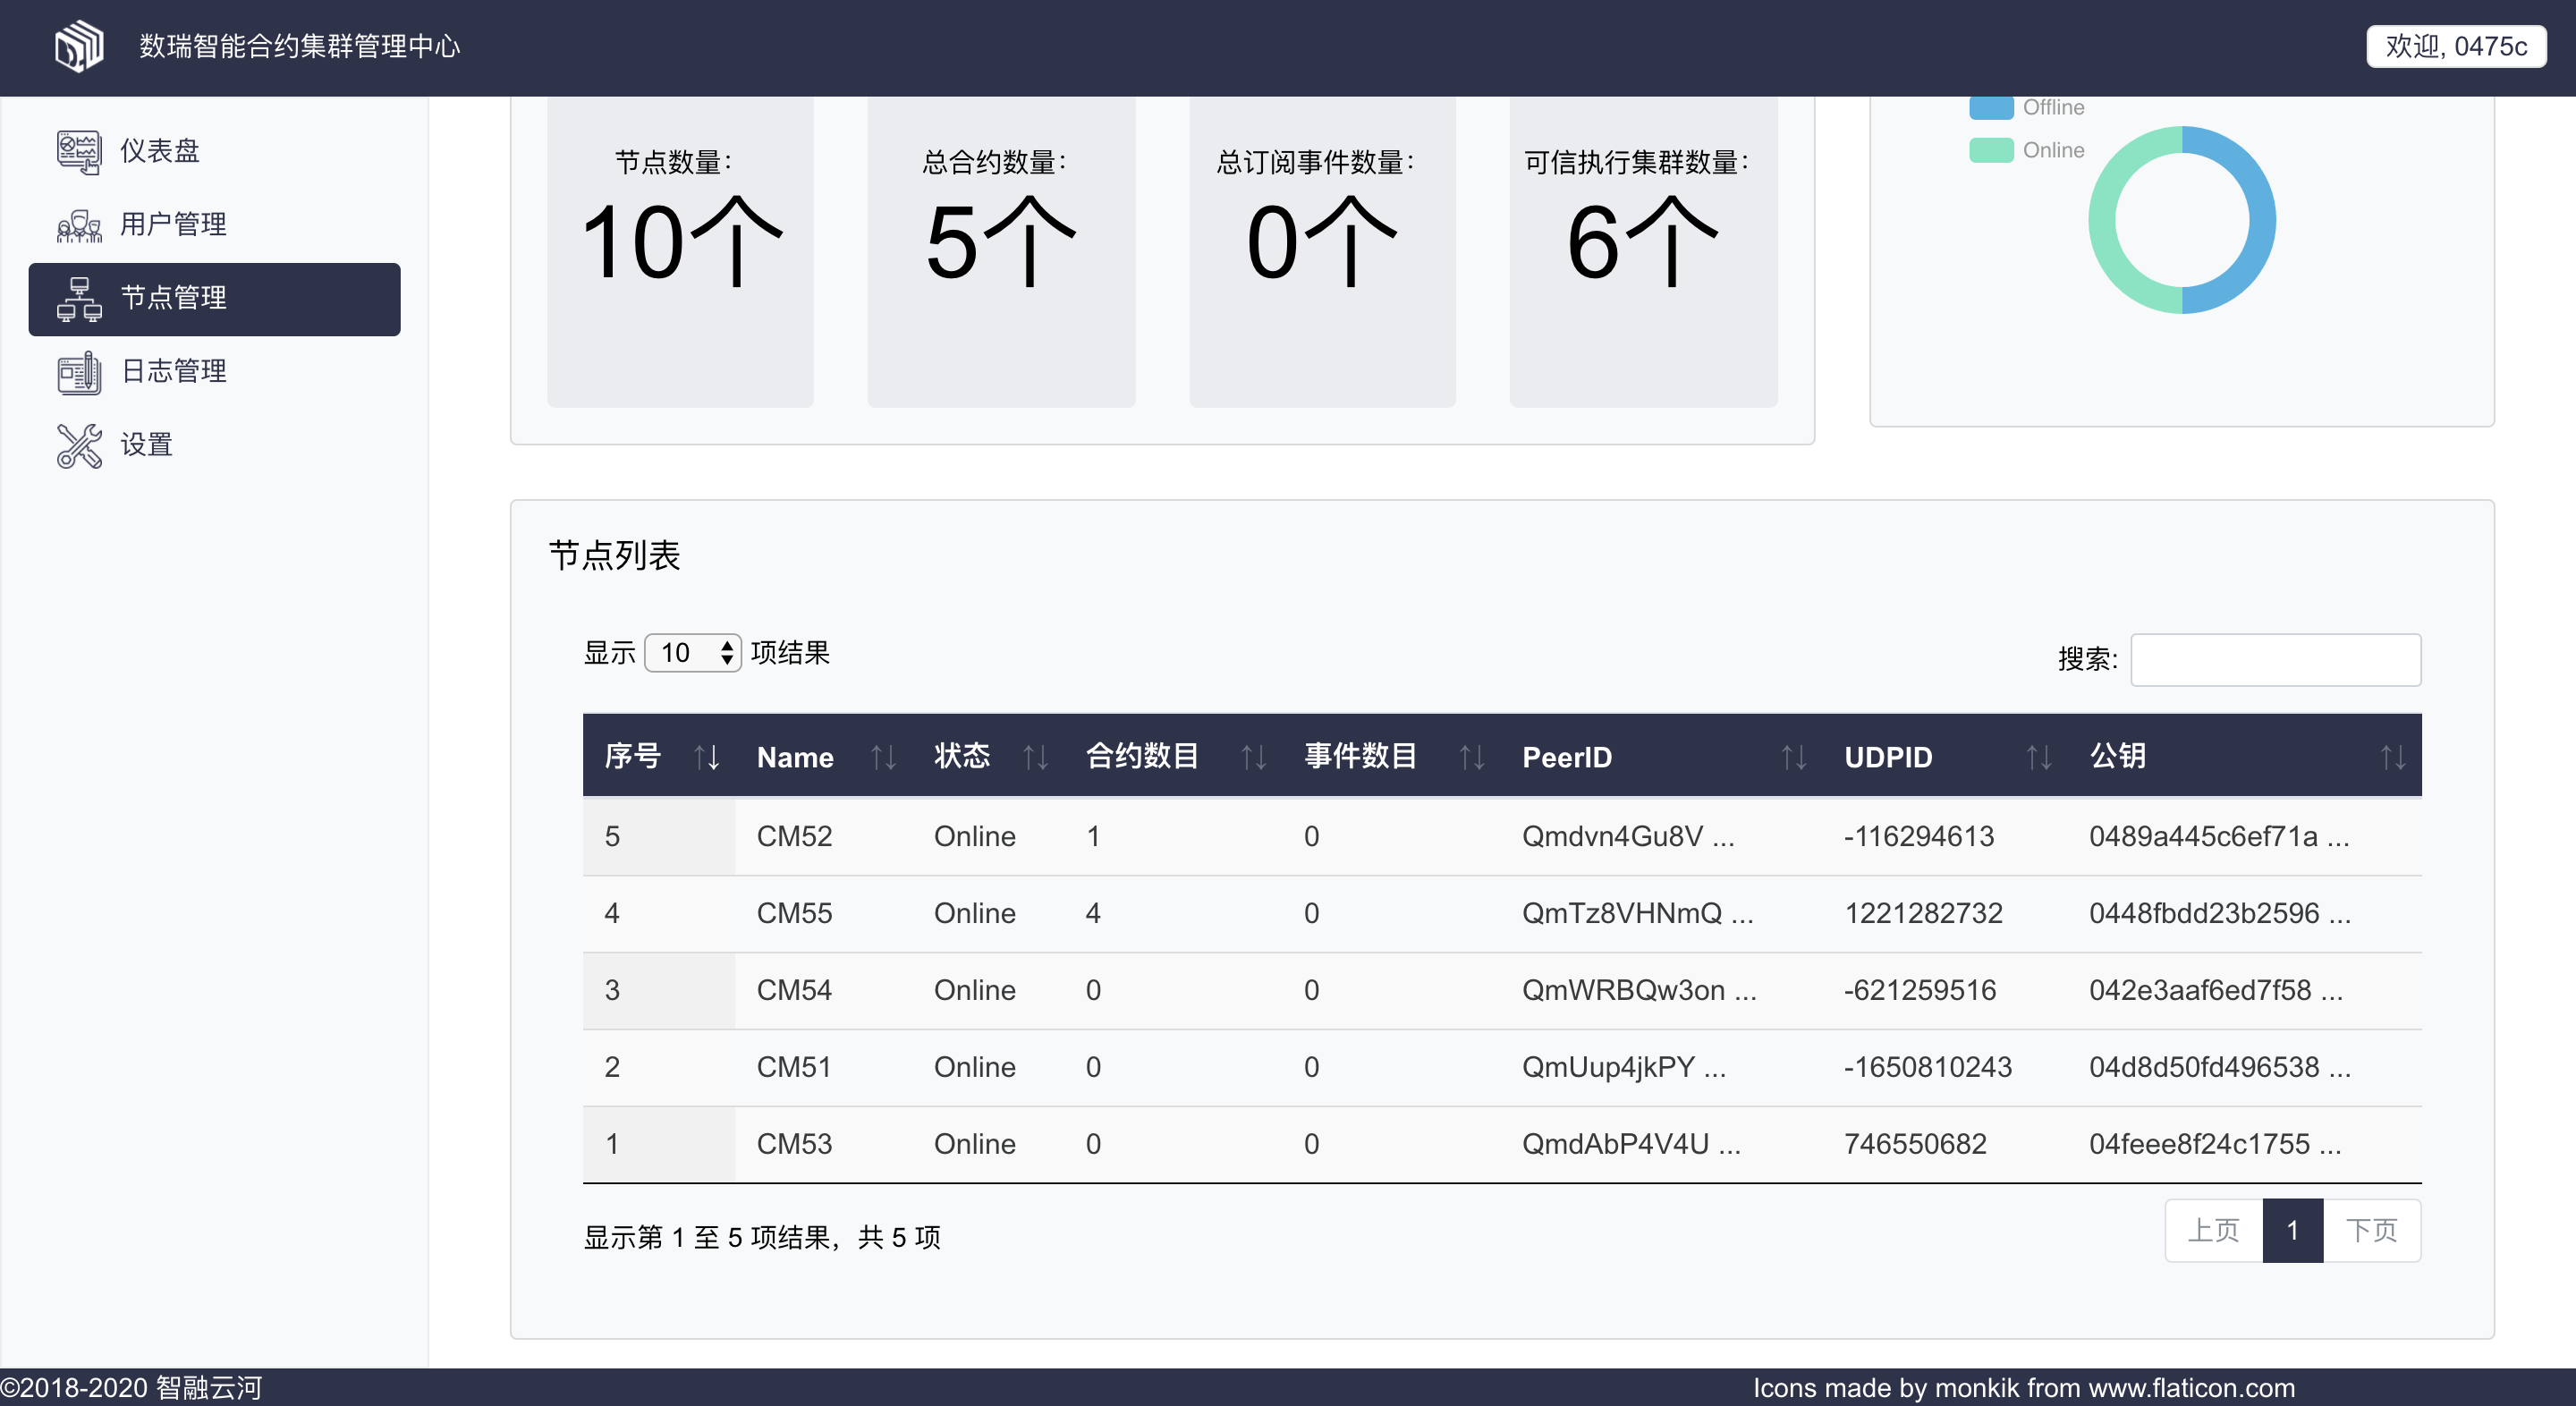
The overview displays the statistics of all nodes managed by the Manager node, including the total number of nodes, the total number of contracts, the total number of subscription events, and the number of trusted execution clusters. The pie chart on the right shows the number of nodes that are Online and Offline respectively.
The node list
The node list shows the node information that the user has the permission to view. (The Manager administrator can view all nodes, and the contract Manager can view the Online node that he is responsible for managing.) This includes the node name, status, number of contracts, number of subscribed events, PeerID for P2P communication between nodes, UDPID for UDP communication between nodes, and the node public key.
List of trusted execution clusters
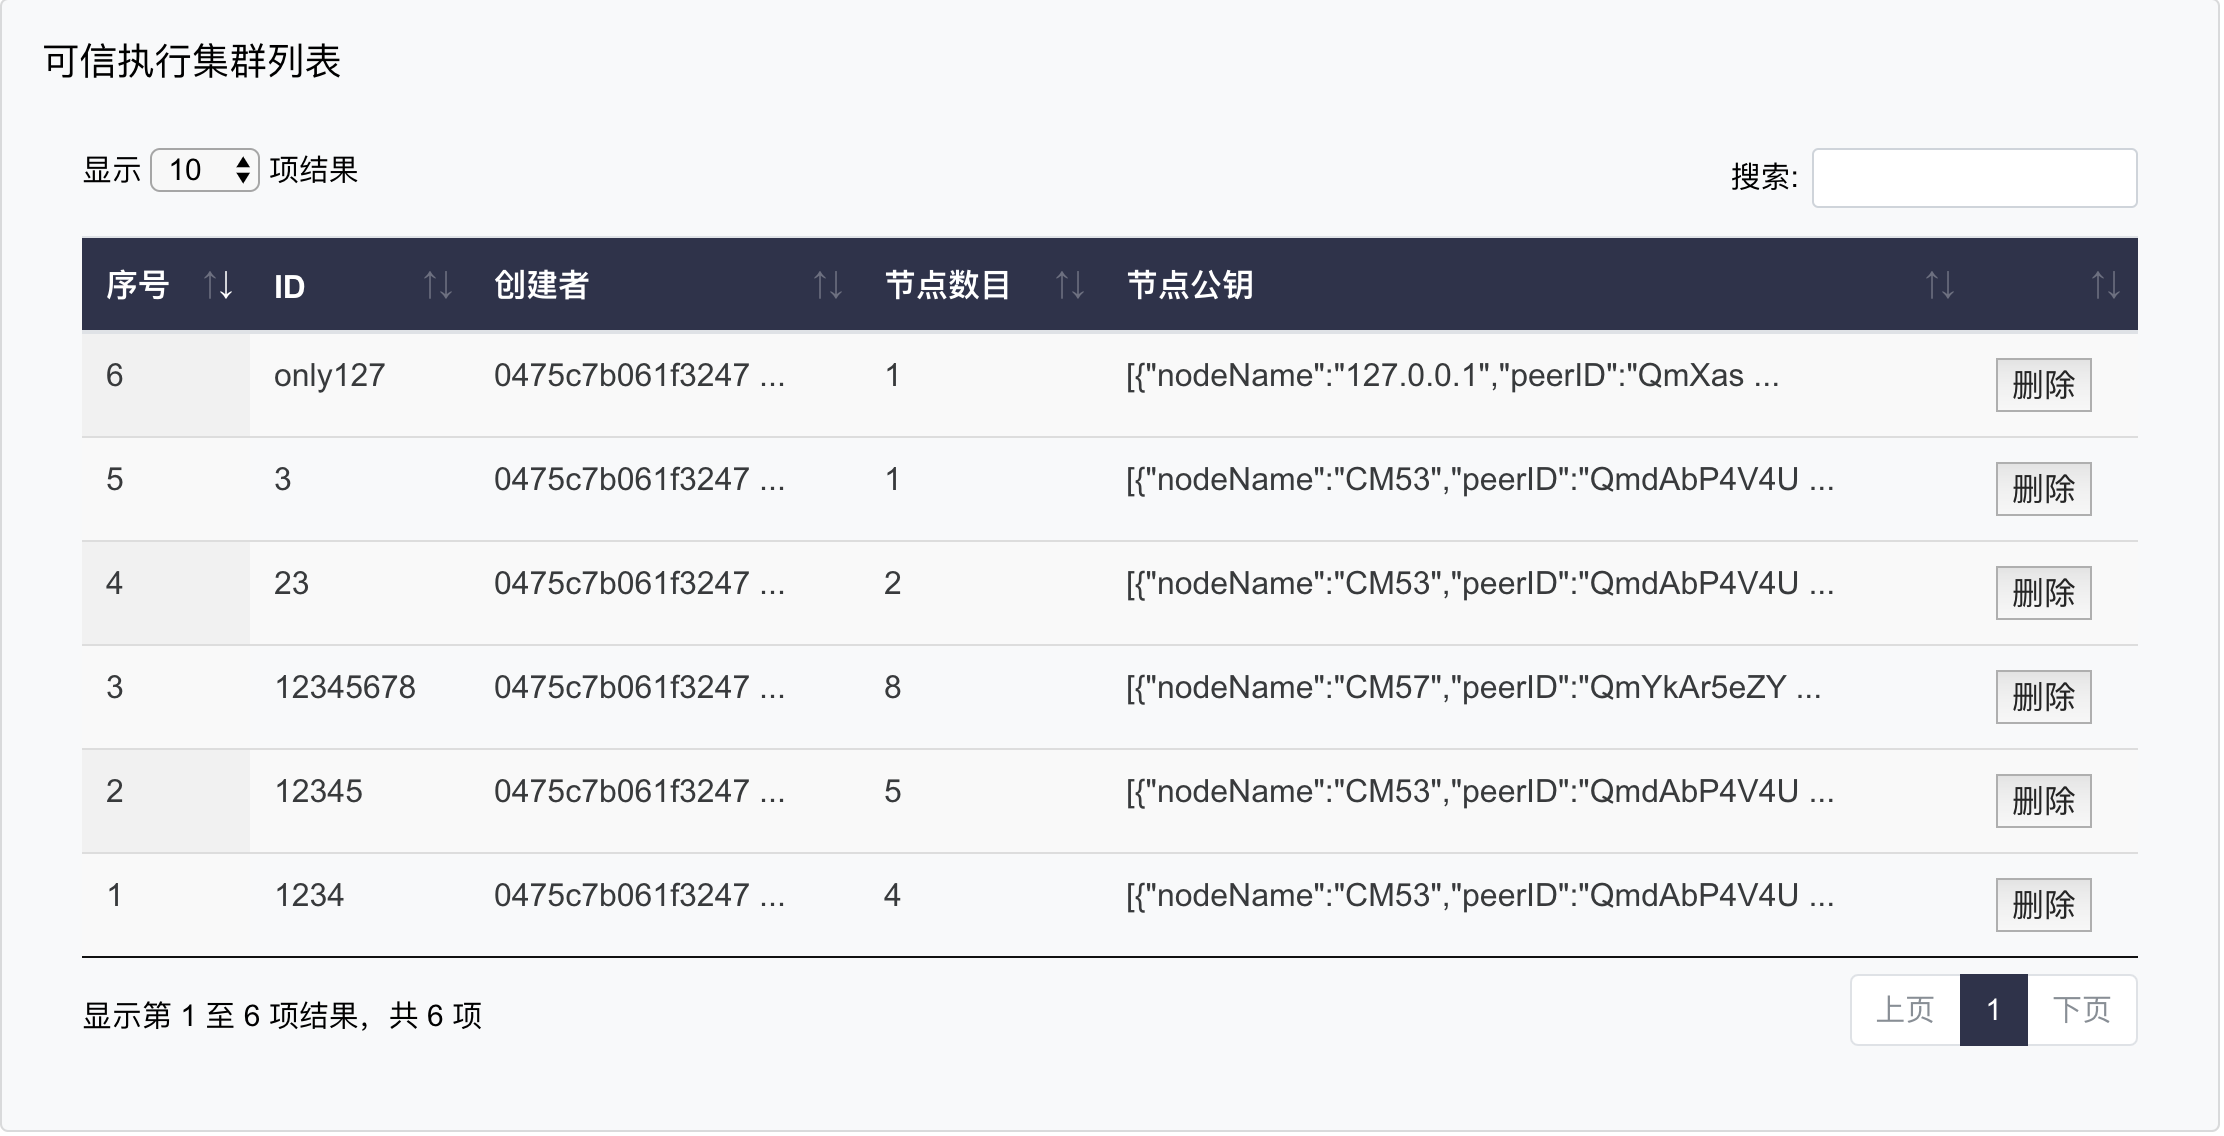
The trusted execution cluster list displays the trusted execution cluster information that the user has the permission to view. (The Manager administrator can view all the clusters, and the contract Manager can view the clusters created by himself.) This includes the creator of the cluster, the cluster ID, the number of nodes in the cluster, and information about the nodes in the cluster.
You can click the “Delete” button of the column entry to delete the cluster.
Create a trusted execution cluster
You can create a new trusted execution cluster by selecting multiple nodes. The nodes that users can select are those they have permission to view, that is, the Manager administrator can select from all nodes, and the contract Manager can select from the Online node that they are responsible for managing). Select and click Submit. A message indicating that the cluster is created successfully will be displayed in the list of trusted execution clusters. The cluster name is selected by the creator and cannot contain double quotation marks. The cluster name is visible when the contract manager selects the cluster.
Log management
Log management displays the log information of admission nodes and consists of six modules.
An overview of
Classified Statistics of Management Operations (2 days)
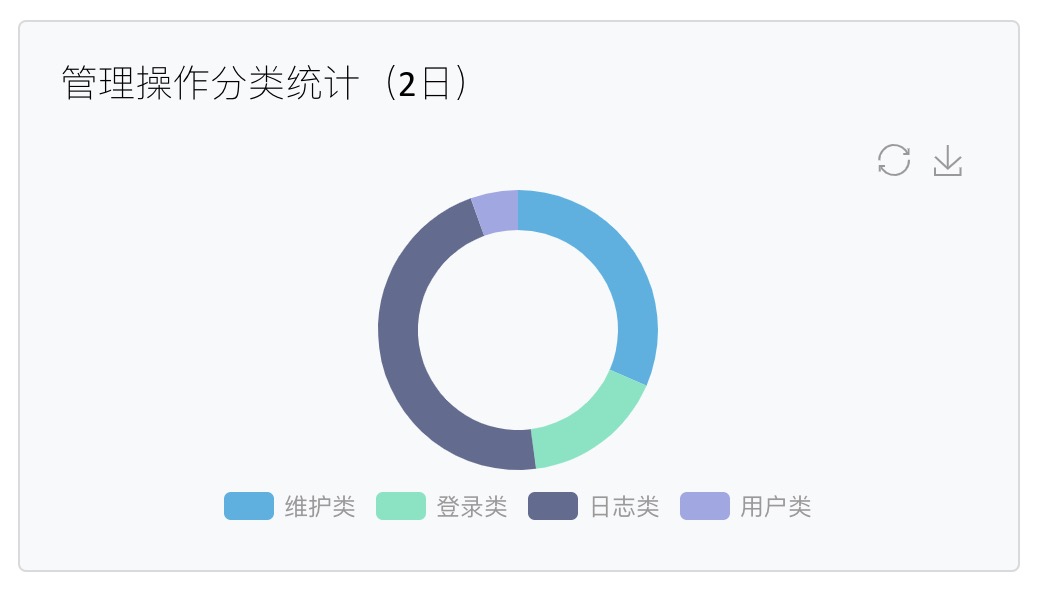 Pie chart of all management operations in the last two days. Management operations are classified into login, log, maintenance, and user operations.
Daily Statistics of Management Operations (2 days)
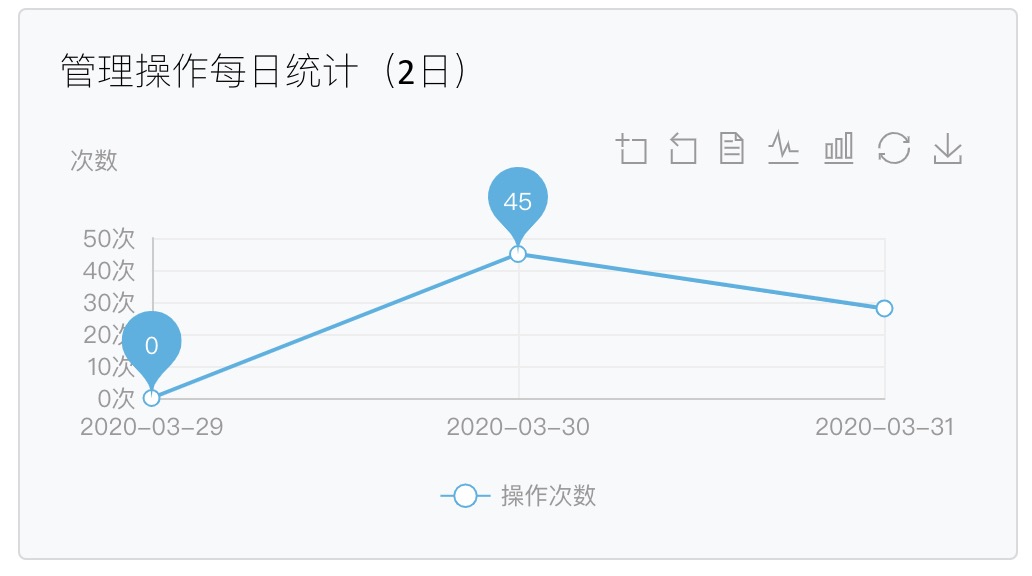 Daily operation statistics of all management operations within two days
Statistics on Contract Operations by Category (2 Days)
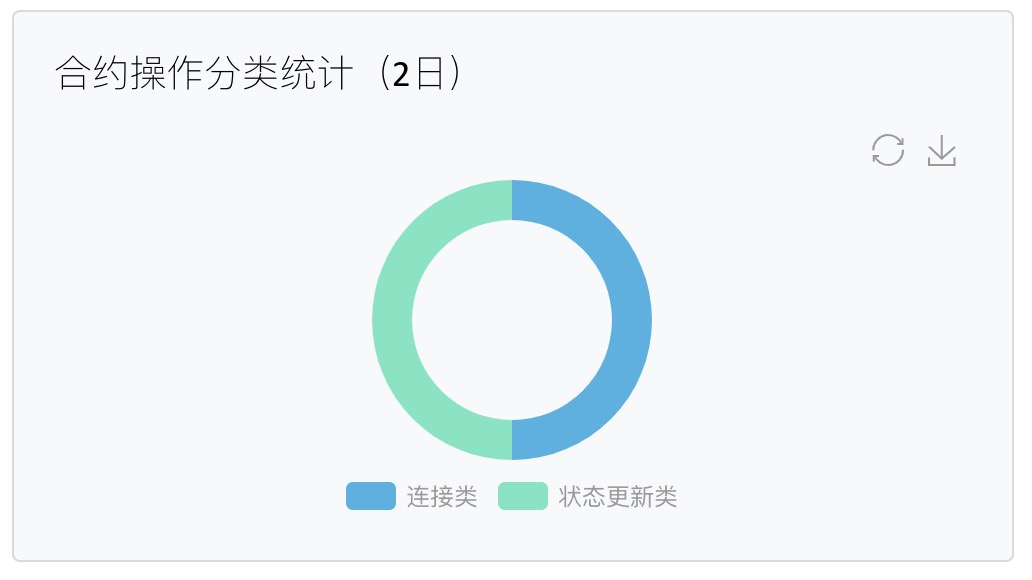 Two day contract operation classification statistical pie chart, contract operation is mainly divided into connection class and status update class.
Daily Statistics of Contract Operation (2 days)
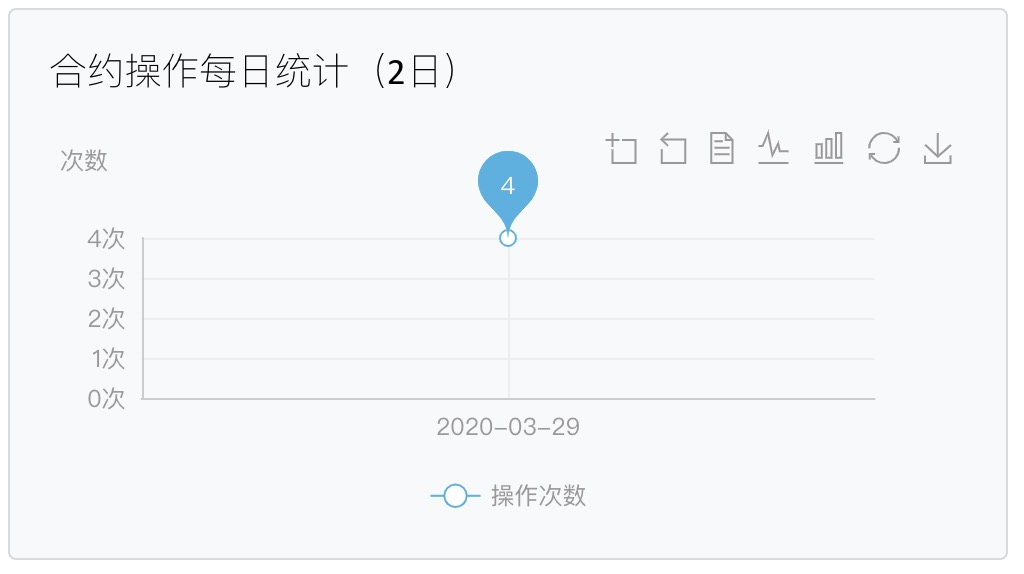 Chart of the broken line of the number of contract operations in two days.
Manage the operation log list
 Manage the detailed information list of operation logs. The information includes log time, management operation name, and node public key corresponding to the operation. The default value is two days. You can customize the days for obtaining logs.
List of contract operation logs
 Detailed information list of contract operation logs. This parameter includes log generation time, contract operation name, and public key of the contract operation node. The default value is two days. You can customize the days for obtaining logs.
Set up the
The Settings page displays the status of node certificates and configures node certificates
An overview of
Certificate status
 The certificate status includes the license expiration time and the number of licensed nodes.
Certificate of configuration
 Configure the certificate module. You can download the node ID file or enter the certificate information for submission.
